

Often shrouded in mystery, mastering audio eludes beginners or non-experienced audio engineers. Its role has evolved throughout the years, but the basic principles remain the same. The final phase of music production, its purpose is to optimise tracks and prepare them for release.
Using a combination of EQ, limiting, and compression, mastering ensures that your music translates across a variety of sound systems ranging from laptop speakers to car stereos. It polishes your music, ensuring it delivers the best possible listening experience.
This might sound like a lot, but it’s not. The good news is that I can teach you the ways. If you’re looking to release your own music or want to expand your skillset in audio engineering, read on to learn how to master a song in nine easy steps.

In a hurry?
- Prepare: Optimise your listening environment and equipment
- Finish the mix: Perfect the mix and export in the correct formats
- Take a break: Take an extended break and rest your ears
- Apply EQ: Remove unwanted boominess, boxiness, and harsh resonances while boosting articulation and depth
- Compression: Compress your track for dynamic control while adding “glue” to your master
- Enhance and excite: Add the extra sparkle with saturation and stereo-widening
- Limiting: Add a limiter to remove dynamic peaks for consistent levels throughout the track
- Reference: Compare the final master against high-profile songs in the same genre
- Export: your track in multiple formats to fit the requirements of the distributor
How to master a song
1. Have the right studio setup
 Before mastering, check that you have all the equipment you’ll need: a pair of high-quality studio monitors, high-quality headphones, a high-resolution computer monitor, your DAW of choice, and a selection of music software – more on these later.
The next step is to optimise your room sound. Your room has a huge effect on how you hear your song – it influences all your decisions to achieve a well-balanced master.
To ensure you have the most accurate sound possible there are two options. The first and best method is to treat your room with high-quality acoustic treatment, including bass traps, diffusers, and absorption panels.
This helps to balance the frequency response of your room and ensure it doesn’t colour the sound you hear from your monitors.
In essence, this helps to ensure your final master will sound good on every playback system, not just the one that was used to master it.
The second option is utilising room correction software such as Sonarworks SoundID Reference for Speakers & Headphones with Mic. Sonarworks detects the frequency response of your room using a microphone and applies a corrective curve to produce a flat response coming from your studio monitors or headphones.
For the ultimate setup, Sonarworks software can be used in conjunction with acoustic treatment for the perfect listening environment.
2. Make sure your mix is perfect
When mastering, you’re not “remixing” the song or fixing things that are wrong. Mastering serves to enhance what’s already there, showcasing what you want to stand out whilst glueing everything together. If you want it to sound a certain way, do it in the mix, don’t expect to get it there during the mastering stage. For balance, the mix is 80% of the work while the master is the remaining 20%.
You can endlessly go back and forth finishing your mix, so it’s best to commit to the final changes. Referencing on multiple speaker systems can help provide feedback for any final changes you want to make.
Now final changes are made, it’s time to export. Using a meter plugin such as the SSL Meter, you need to monitor how much headroom you leave for the master, this should roughly peak at -6dB with no clipping.
When exporting, select the .WAV file format and export at 48kHz using no Dither. Be sure to deselect any “normalise” function in your DAW as this is a crude way to increase the loudness of your track, something that you will be doing when mastering anyway.
Now you’ve exported correctly, you should pick a reference track. Ideally, pick a high-quality commercially mixed and mastered track which sits in the same genre you are working with. This reference helps inform you of how your track should sound once mastered. Take notes on the specifics; how punchy is it? What is the frequency balance like?
3. Come back to your track with fresh ears
 This one’s easy. Take a rest, plain and simple.
Mixing and mastering over long sessions will give you ear fatigue, meaning you won’t be able to make objective decisions to get the most balanced sound.
Come back to your track after a day or two and it will feel like you’ve never heard the song before. There’s a strong chance you’ll hear things you want to change with the mix, but going back to change the mix could spiral into a never-ending cycle.
Unless there is a huge mistake that you can’t move forward without fixing, listen to the track in full, compare it against your reference track one final time to make sure everything is how it should be and commit to the final mix.
It’s a good idea to take a few notes and plan out how you’ll master the track. This could be anything from making notes on specific frequency ranges that need addressing to mapping out volume automation to give the song dynamics and movement, anything that will help you be prepared as you come to master.
4. Analyse your track in a new DAW project
Your track is ready, time to get it prepped. Preparation is a vital part of mastering, listen to the track and take stock of what’s required. Import the track(s) into your DAW – in this case, I recommend Fender Studio Pro 8 as it offers a dedicated mastering suite with a stellar range of tools – and take a deeper look.
Once your tracks are in your session, import your reference tracks and load up your favourite analyser plugin. Using your meter, check for the stereo image, loudness metering, and frequency metering, SSL Meter is perfect for this.
Compare the details against your reference track and make notes on what’s missing from your track. Does your master need extra low-end? A wider stereo spread? If so, take a note and come back to it when mastering. An important note: always level-match the reference track to make sure any perceived increase in quality isn’t a result of volume differences.
5. EQ your track
 EQ’ing is where the tonal changes come from. Here you sculpt and carve your master to remove frequency masking, create space, and balance across the full frequency range. The general school of philosophy reads: use broad changes when boosting and use surgical changes when cutting.
There are plenty of options when it comes to plugins to use for EQ’ing. The SSL Native Channel Strip 2 models two SSL console EQs in one with beautifully analog sound and plenty of control.
Rob Papen RP-MasterMagic is another great option for mastering as its perfectly-tuned “Air” control gives your track a lift, or you could even use the creative Eventide SplitEQ to independently process the transient and sustain part of a signal at specific frequencies, offering much more control than traditional EQs.
My pick would be the FabFilter Pro-Q 3, though. It’s the industry-standard digital EQ plugin with a clean and transparent sound, visualizer, and the ability to independently process left and right channels for more control.
When EQ’ing, using a visualizer is ideal for finding harsh resonances which peak above the rest of the frequencies, these can be removed with a narrow Q and aggressive cut. You’ll typically find these between 5 and 9kHz.
Broad, subtle changes of up to 3dB can be used in the low-end to add weight and energy, along with shelving boosts in the treble range from 8kHz upwards to enhance the brightness for articulation.
6. Compress your track
A compressor is an essential tool in mastering. It is used to control the dynamic range of the audio, helping to maintain consistent levels throughout the music.
For effective mastering, only about 1-2 dB of gain reduction is required, as this process involves subtle adjustments. The attack time on the compressor should be set conservatively. If it’s set too fast, the song could end up sounding dull. A starting point of 10ms is recommended, although this can be adjusted depending on the pace of the song.
The release time of the compressor is another important setting. It’s recommended to use the “auto release” setting if available as this tends to produce a more natural sound. If this option is not available, start at 150ms and adjust it to match the tempo and feel of the song. Faster releases will work with faster songs, slower releases work with slower songs!
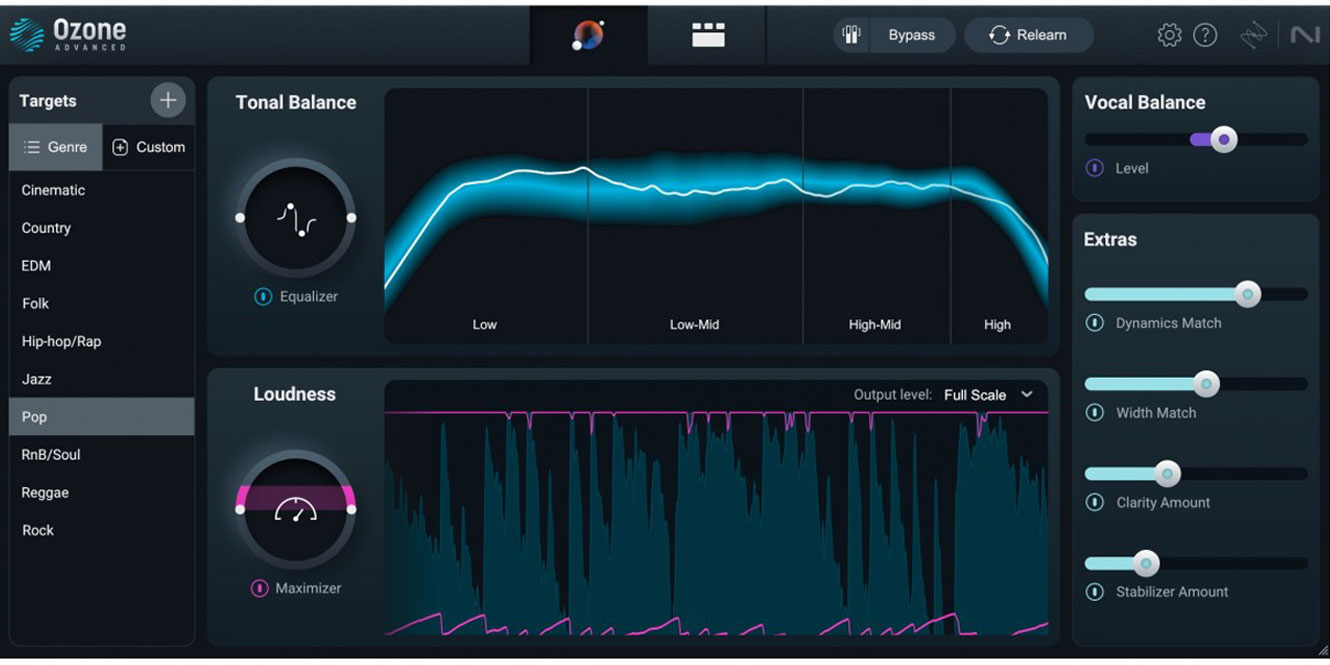
Getting the compression right is often where engineers struggle. It can be complex and can make or break a release. That’s why I’d recommend iZotope Ozone 11 Advanced. You can utilise the automated parametrisation and tweak to your liking. It also has the added benefit of being multi-band, applying different compression characteristics to different frequency bands for a more natural tone.
To find out more about compression and how to use it correctly, have a read of our in-depth guide.
7. Enhance it
 An optional stage when mastering is using enhancers. Many engineers opt for the addition of harmonic excitement and stereo wideners to “enhance” the overall sound of the master.
Saturation applies colour to your sound and helps fill out your master. A fantastic plugin to use for this is the Saturate plugin found in the Newfangled Elevate Bundle. It’s perfect for dialling in the right amount of grit to help make things sound more “alive”.
A little goes a long way with saturation, and too much can result in a crunchy, unpleasant sound. When in doubt, dial it back.
Using stereo widening helps create separation, providing each instrument with its unique space. This helps to create the width that you hear on modern pop tracks where the track fills the room with sound. Similar to saturation, a little goes a long way as too much can cause phasing issues.
It’s important that you don’t apply stereo widening to frequencies below 120Hz and keep them in mono. If you’re unsure of how much to use, the Imager built into iZotope Ozone 11 Advanced is fantastic at naturally widening your sound using AI technology.
Another way to enhance your master is with volume automation. This can bring out certain parts of the song that require your focus. Try lifting the chorus one dB up from the verses to bring listeners into the sing-along sections or ramp up the volume before an EDM drop – not so much that it’s off-putting, but enough that it would make an impact on the listener.
8. Limiting
A crucial step in the mastering process, limiting makes your track louder and increases the perceived loudness. Acting like a compressor, the dynamic range is reduced with a “brick wall” limit, increasing the perceived loudness without clipping your output.
Start by setting your output ceiling under 0dBfs, between -0.3 and -0.5dB. Next, drive the input gain to increase the loudness of your track and introduce gain reduction of around 8-12dB. This will emphasise your limiter, letting you audibly hear the effect.
Adjust the attack and release, setting them slow at around 100ms/500ms respectively. The attack setting can be decreased until the limiter acts before the transients, removing the impact. At this point, dial it back slightly.
The release setting then should be decreased until distortion occurs. When this happens, again, dial it back slightly.
Now you can back down the gain to reduce the gain reduction and increase the dynamic range whilst aiming to achieve commercial loudness levels. Using your metering plugin, aim to achieve -14dB integrated LUFS for optimal balance between loudness and quality.
There are lots of plugins that offer excellent limiting applications, but I recommend IK Multimedia T-RackS 5 MAX as it includes multiple extremely accurate models of vintage hardware limiters and proprietary designs. Useful for either imparting a distinct analog character or entirely transparent processing.
9. Export your track
 Now it’s time to turn this project into a song you can share!
First, always export your project as a lossless file, either as a WAV or AIFF. Second, make sure you’re exporting in multiple formats for a variety of destinations where your music can be found.
You don’t want to have to revisit this later, so I advise having multiple different exports of the track in as many formats as possible to comply with any deliverables required. This may take extra time but is worth it in the long run.
Compared to mixing exports, when mastering you need to use a Dither option. These essentially prevent any distortion when the file is being bounced to a different resolution.
POW-r 1 is good for low dynamic range material like spoken word, POW-r 2 for medium dynamic range music, and POW-r 3 is better for material with wide dynamic range like orchestral music.
The settings you will need to use:
- CD: Lossless file type such as WAV or AIFF at 16-bit and 44.1kHz
- MP3: Select the highest kbps setting possible, this is typically 320 kbps
- Online distribution: Streaming services accept a variety of file formats so use the highest settings possible in a lossless file type such as WAV or AIFF at 24-bit and either 44.1 or 48kHz sample rate
Lastly, don’t use the Normalize function in your DAW, just like when you bounce a mix, as you have already made the track commercially loud. Select “OK” (or whatever phrase your DAW uses) and you’ve mastered a song!
What is the difference between mastering and mixing?
Mixing and mastering are two different principles which take a very different approach to getting the best sound from your tracks. Once your track has been recorded, mixing is the stage where the aim is to blend individual tracks together, while mastering is the final stage of audio production, applying processing across the entire mix to prepare for distribution.
The main difference between mixing and mastering is that when mixing, you’re working with all the individual tracks that make up a song as a whole, creating a balanced mix where each track is audible in its own space. When mastering, you’re often working with a singular stereo track, enhancing the overall sound to achieve consistency and competitive loudness.
Mixing gives you access to every instrument in a song, allowing you to adjust individual levels and process individual tracks independently, while mastering gives you access to the final mix. This makes altering the balance between individual elements much more difficult.
Mixing sessions can be huge. A simple arrangement can often feature 50+ tracks, while complex projects can have track counts in the hundreds. Mastering sessions, on the other hand, typically consist of one stereo or multitrack file per song.
While mixing, you make lots of adjustments where each adjustment can be as heavy-handed as required in order to achieve the balance and sound you need. Mastering is the complete opposite – it requires subtle broad strokes to ensure you’re not changing the tonal character of the song, maintaining the tone of the original mix.
The mixing process is about enhancing the artist’s vision, making sure that the original emotional intent is conveyed. Mastering, on the other hand, is focused on sound quality. It ensures that the song sounds just as good across multiple playback systems, from car stereos and consumer-grade headphone/earphones to nightclub PA systems, whilst being competitive in loudness.
Why should you master a song?
Mastering a song is a critical step in the process of music production. It ensures that a track will be suitable for an array of listening devices. Whether the song is being played on a small phone speaker or a large sound system, mastering guarantees an optimal listening experience. This process adjusts the tonal balance and dynamic range, making sure the track sounds its best on any platform.
Creating volume uniformity across all elements of a track and an album is another crucial reason for mastering. It ensures that the volume and tone remain consistent throughout, providing a seamless listening experience. This is important when multiple songs are compiled into an album, ensuring a cohesive sound.
In today’s music industry, louder tracks often command more attention. Mastering provides this competitive edge by amplifying the volume without compromising sound quality. It’s through this process that songs can stand out in a crowded market.
Lastly, mastering ensures that master tracks are exported in the correct format. This is crucial for compliance with online streaming services, which have specific requirements regarding file formats. By adhering to these standards, music can reach a broader audience without technical difficulties.

Why master your own song?
There are many reasons why mastering your own music can be beneficial. It provides artists with greater control over their work, while also offering valuable learning experiences while saving on production costs.
The cost of hiring a professional mastering engineer is often expensive. This expense is an entry barrier that is out of reach for many musicians. By mastering your own music, this cost can be avoided.
It’s not just a cost-saver, it’s another skill to add to your repertoire as a musician. It not only enhances your abilities but also diversifies your skill set and could open up new possibilities and opportunities!
You also gain complete creative control over the final sound when mastering your own music. This allows for the precise shaping of the sound according to your vision, without compromise or external influence.
Critical listening skills are improved through the process of mastering. These skills, once developed, can greatly enhance future mixes. They assist in identifying intricate details and optimising sound quality.
Time is a significant factor as well. If you master your music, you don’t have to wait to get the masters back from a professional. This ensures quicker turnaround times, enabling faster releases.
Professionals exist for a reason
While many musicians want to retain complete creative control, hiring a professional mastering engineer can provide a myriad of benefits to help create the best product possible for you.
Before engaging in the mastering, an external mastering engineer offers an objective and experienced perspective on your track. The benefit of a second opinion cannot be overstated as they can provide suggestions regarding the mix in order to achieve a better final master.
These professionals often have access to top-tier equipment. They also ensure your music translates well across various systems, ranging from small laptop speakers to large venue public address systems, a key factor in releasing competitive music.
A difficult skill to learn, the years of experience and honed skills cannot be understated. They will often call upon past experiences to ensure your master sounds as best as it can for the genre and style. Additionally, their experience ensures that your tracks can be optimised for specific streaming platforms to deliver a competitive product that stands out.
Hiring a mastering engineer will also help alleviate any harm you could do to your music if you attempt to master it yourself without understanding how to do it properly.
There is an alternative…
If you’re not up for truly mastering your track, there’s an alternative: automated mastering. AI mastering services are growing in popularity due to continuous improvements in the technology. The process is efficient, simple, and more cost-effective than human mastering engineers. For musicians on a tight budget, automated mastering is an excellent option.
Despite these advantages, these services may not match the precision of a human engineer. An experienced engineer can accurately judge how a track will sound to a listener, ensuring optimal translation across multiple systems.
A middle ground between AI and the human element is software like iZotope Ozone 11 Advanced. This software uses AI to automate much of the workflow whilst providing the user with full control over every element of the master.
Our top tips for mastering a song
Don’t be too heavy-handed
When mastering, subtlety is crucial. The key is to enhance the existing sound; over-processing a master can lose the essence of the original. Small, incremental adjustments often yield the best results as any large sweeping changes will often mean there is a problem in the mix that needs addressing before mastering.
Consider the ideal destination/environment for your song
Before mastering, consider the ideal environment for your song to be heard in. The genre plays an important role, for example, EDM and dance tracks are destined for large, live PA systems and blues and soul tracks will usually be played on vinyl.
Bass-heavy songs require different dynamics and EQ processing than something that’s vocal-driven. It’s also worth noting which format or streaming platform your song is intended to be listened through. Certain streaming platforms require specific target levels and formats to get the best sound, so pay careful attention to this.
Start with three tools at first and work your way up
There is a myriad of complex tools to use when mastering, but I recommend you start with the three main essentials: equalization, compression, and limiting. Understand these tools thoroughly before moving on to more complex ones.
Equalization helps balance the frequency content, compression manages the dynamic range, and limiting prevents the audio from clipping. Once you’re comfortable with these tools, expand your toolkit to include others such as stereo enhancement or harmonic excitation.
Level match your reference track to your master
During mastering, it’s important to have a reference track. This will guide you on what your master should sound like and it sets the listening expectations of different genres and styles. However, ensure that the loudness of your reference track matches your master.
If the reference track is louder, it may be falsely perceived as better due to our perception associating loudness with quality. Use a loudness meter to match the perceived loudness of your reference track to your master.
Monitor from different sound systems
Monitoring your master on a variety of speakers is essential for translating your song across different systems.
Each sound system will reveal different characteristics of your track, and so monitoring across multiple systems and monitors allows you to understand how your song will translate across various listening environments. Listen to your master on studio monitors, headphones, car speakers, and even smartphone speakers if possible.
FAQs
How long does it take to master one song?
It takes 30-90 minutes to professionally master a track. Beginners may take between hours and days depending on ability. AI services, on the other hand, offer instant online mastering. Creating several masters for different streaming services and the quality of the mix typically determine the time it takes for mastering.
Is it OK not to master a song?
A song should always be mastered before release. Mastering ensures the song translates well across various systems, from cars to large PA systems, and is compliant with streaming service requirements for the best sound possible. It’s also the last quality control step before your music is released.
Do musicians master their own music?
Musicians can master their own music, though it’s recommended to hire a professional. Mastering your own music saves on costs and allows you to apply creative mastering, but hiring a professional gives you fresh objectivity, hearing the problems you can’t after mixing the track for so long.
Final thoughts
Mastering isn’t a mystic art, it just takes patience, practice, and a lot of preparation. With only a fraction of the tools that you will use during the mixing process, you can master a song in as few as nine steps. Learn your tools, learn the song, and get practising.
If this all seems like one step too far for you, that’s absolutely fine! There are professionals offering their services and even online and instant mastering solution alternatives. Whatever works for you and your music is the best option to go for.


")


0 Comments