

Getting the perfect kick drum sound can be tricky, especially if you’re EQing it yourself. You may have tried EQing that low-end thump yourself, or this might be your first time, but either way, it’s good to know a few kick drum EQ basics.
In this article, we’ll discuss some essential frequencies, handy tools, and helpful tips for making your kick drum sit perfectly in your mix. Remember, EQ is all about finding what works for you, and there’s plenty of room for you to get creative! Everyone has their preferences, and the process you take in your DAW will be personal to you and your style.

The perfect kick drum EQ
The ideal kick drum should sound clear, punchy, and well-balanced in the mix. Its fundamental frequency lies in the 40-100 Hz range, and you can use a high-pass filter after this to gently remove any unwanted sub-bass frequencies. It also sounds great with a bell filter providing a subtle boost to the fundamental frequency. This will give your kick some weight or help cut down any muddiness in the 100-250 Hz range.
Don’t forget to check for any boxy sounds around 250-400 Hz, which you can reduce to improve clarity.
If you want to bring out the kick’s presence and attack, give a little boost in the 2-5 kHz range. For even better precision, you can use dynamic EQ to manage specific frequencies that might change throughout the track. The main aim is to ensure the kick drum stays powerful, consistent, and punchy.
Start at the source
To get the best EQ for your kick drum, it’s important to start with a great drum kit recording. If the sound isn’t clean and balanced right from the get-go, no amount of EQ will really fix it.
To achieve a good studio-quality recording, you should set up in a space that will give you a dry sound, with as little reverb as possible. Use rugs and foam panels to create a dead space to set up your kit. You can even use your furniture.
Once you’re happy with your room setup, listen closely to the natural tone and dynamics of your kick drum. The aim here is to remove any unwanted resonance or noise before making any tuning adjustments. You’ll want to make sure that the recording space and techniques are as perfect as they can be, so you don’t have to do too much editing.
When you begin with a sound that matches your musical aims, the EQ process becomes much smoother, and you’ll find it easier to create a more cohesive mix.
Kick drum setup
 Start by tuning the drum to make sure its fundamental pitch and resonance are nicely balanced. Don’t rush this process – take your time adjusting the tension on the drumhead evenly. You want your kick to sound full and vibrant, without any unwanted overtones getting in the way.
You might also want to change your drum head to get the kind of sound you’re after. Each type of drumhead provides a different sound, so make sure you choose one that best suits your setup, genre, and playing style.
Coated heads give you a warm, soft sound, while clear heads provide a sharper, more focused tone. We highly recommend the Evans EMAD2 Clear Bass Drum Head. It comes in a variety of different sizes, making it versatile for any drummer’s needs.
If you’re looking for maximum resonance – perfect for acoustic settings – single-ply heads are the way to go. Remo’s Powerstroke 3 Coated 22” Impact Patch Drum Head is a great choice if you’re looking for a single-ply head that delivers a punchy kick sound.
If you need something tough and controllable for rock or metal, double-ply heads are fantastic. They sometimes produce fewer overtones, but you can achieve a deep and controlled sound.
Your beater also contributes towards your kick drum sound. Felt beaters offer a nice, balanced sound that works well for almost any style. I’m a big fan of the Tama CB90F Iron Cobra Felt Beater. It provides a punchy tone and responsive feel, complementing my specific playing style and sound.
If you’re after a sharper attack, you might want to try plastic beaters, or if you want a powerful punch, go for a wooden beater – these are great for louder and more aggressive music.
Ported heads, which have a hole in them, can help reduce resonance and are super handy in studio settings or for genres that need a tight, controlled low end, like rock and pop. They also allow for the placement of an internal mic. However, you may prefer non-ported heads if you need more resonance for jazz or acoustic setups.
You should also look at dampening options to reduce excess ringing and control overtones and sustain. There are internal methods like pillows, blankets, and the Evans Bass Drum Muffling EQ Pad or external options like felt strips that nicely dampen the sound without losing its natural quality.
Microphones
 Selecting the right microphone and experimenting with mic placement is essential to achieving a good kick drum recording. This influences the tone, clarity, and overall presence of your kick in the mix.
Dynamic microphones are a popular choice because they’re durable and can handle high sound pressure levels without distortion. Their focused pickup patterns make them excellent for isolating the kick drum from bleed caused by nearby drums or cymbals.
They also have relatively small diaphragms, which enhance the punch and mid-range attack, making them ideal for genres that require a tight and punchy sound. I use the Audix D6 because it delivers a modern, aggressive kick tone.
Condenser microphones are more sensitive than dynamic mics and capture a wider range of detail. They’re great for highlighting the intricate nuances of a drummer’s performance and are particularly useful if you want some detailed low-end definition.
The Shure Beta 91A Condenser Kick Drum Microphone is a fantastic option for achieving a sharp attack while retaining the kick drum’s rich low-end frequencies.
Subkick microphones are specifically designed to capture the extreme low frequencies, adding weight and depth to the kick sound. These microphones often complement traditional mics, especially in bass-heavy genres like hip-hop or electronic music. Their large diaphragms are key to picking up sub-bass frequencies that smaller mics might miss.
When it comes to placement, positioning the microphone inside the drum offers different options for tonal variations. A mic placed near the batter head emphasises a clear, snappy attack, while positioning closer to the resonant head captures deeper, fuller low-end tones.
Placing your mic outside the drum provides a natural, rounder low-frequency sound and works well in studio recordings, though this placement can introduce more bleed from other instruments.
You can also consider using a dual-mic setup. Combining an inside mic for attack with an outside mic for warmth allows you to blend the best of both worlds during mixing. However, it’s crucial to check the phase alignment between the two microphones.
If the phase is off, the signals may cancel out certain frequencies, leading to a thin or weak kick sound. To fix this, flip the phase on one mic channel or adjust the placement until the two signals work together harmoniously. Experimentation is key to finding the perfect balance for your music.
Kick drum EQ – the complete guide
1. Identify the fundamental frequencies
The sound of a kick drum can be broken down into these frequency bands:
- Sub-bass (20–60 Hz): Adds weight
- Bass (60–120 Hz): Adds punch and body
- Mid-range (200–1,000 Hz): Enhances the “knock” or tonal body
- High-end (3,000+ Hz): Brings out attack and clarity
A kick drum’s frequencies are often balanced for clarity. Knowing how to adjust these ranges can really enhance your kick drum sound. A little boost in the body can add depth, and emphasising the attack and presence makes everything crisper and more articulate.
Cutting certain frequencies is also important. For example, the 250 – 400 Hz range can sometimes make the kick sound boxy or hollow, and muddiness in the 100 – 250 Hz range can clutter your mix. Making subtle reductions in these areas can really help improve clarity and balance.
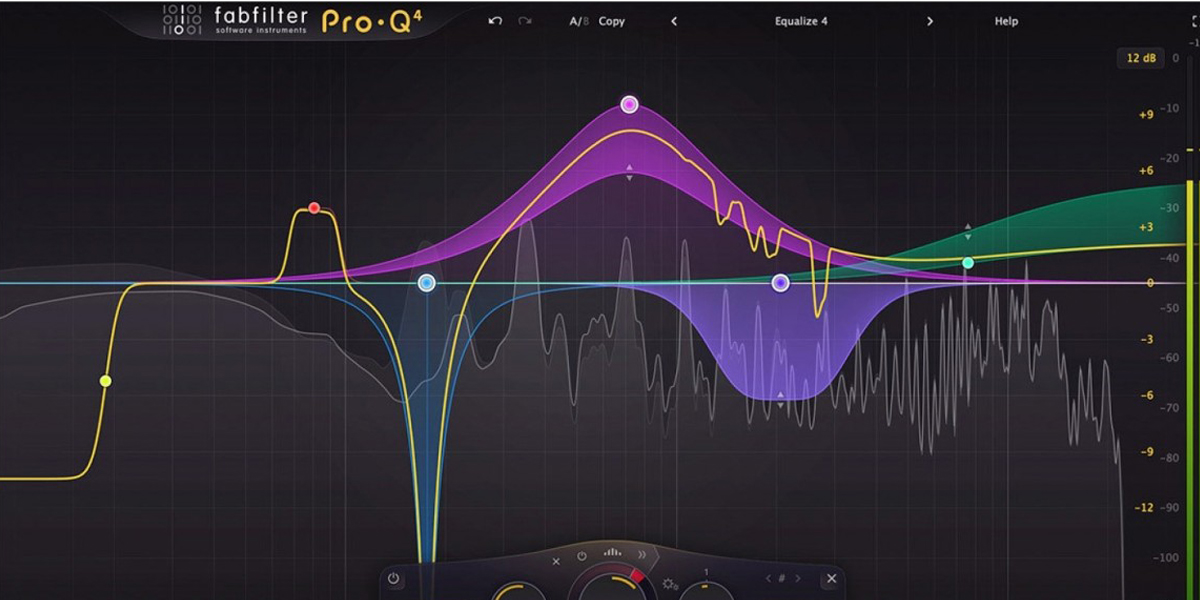
Spectrum analysers can be great tools for spotting those frequencies. They allow you to visually see peaks and identify problem areas so you can make informed EQ choices. Pairing this visual information with your listening skills will help you create a clean and powerful kick drum sound that stands out in your mixes.
2. Shape your sound and add clarity
Let’s start with the low end. A gentle boost in the 40-100 Hz range can add some nice depth and power, which is important for genres like electronic and hip-hop. However, if you’re working with a bass guitar that’s sitting in a similar range, you might want to consider cutting a bit here to avoid muddiness and keep everything balanced.
Next up is the 200-400 Hz range. Too much energy here can make your kick drum sound a little boxy, which isn’t ideal. A small cut can really help open it up and improve its definition, letting you keep that warmth without sacrificing clarity.
A boost in the 2-7 kHz range can help to highlight the beater’s click, giving your kick drum that extra definition it needs to cut through busy mixes. This is important in genres like metal and rock, where you want your kick to be heard alongside all those guitars and powerful vocals.
Just be careful with your adjustments here to ensure you keep that clarity without it becoming harsh. Remember, EQ is your sculpting tool. By making thoughtful boosts and cuts, you can shape your kick drum’s frequencies to fit your track perfectly, resulting in a punchy and clear sound that stands out beautifully in the mix.
3. Use a dynamic EQ
Dynamic EQ is a handy tool that adjusts itself based on what the sound is doing. It applies boosts or cuts only when certain frequencies go over a set threshold, making it perfect for smoothing out those inconsistencies in a kick drum’s sound throughout a track – especially when the arrangement changes dynamically.
The FabFilter Pro-Q 3 is a great option if you want an industry-standard user-friendly EQ. Its dynamic EQ options make it a useful tool for musicians at any level. It’s a personal favourite plugin of mine!
In the 80-100 Hz range, dynamic EQ can help control any occasional boominess while keeping that powerful low-end intact. This way, your kick drum sounds balanced, whether you’re in a quieter verse or an intense chorus where those low frequencies might naturally get a bit louder.
It’s also great for managing the click of the kick drum in the 2-4 kHz range. It ensures that it cuts through the mix when it needs to but avoids sounding harsh during softer sections. Plus, it can help reduce muddiness in the 100-250 Hz range, keeping everything clean and focused without sacrificing the warm sound of the kick.
The best part about dynamic EQ is its precision. By targeting those tricky frequencies only when they need attention, it avoids the one-size-fits-all approach of static EQ, helping to keep the overall tonal balance intact. This means your kick drum stays clear, punchy, and consistent, no matter the mood or intensity of the song.
4. Think about your genre
Getting your kick drum’s EQ just right is important for matching the feel of your track. If you’re working with rock or metal, consider cutting a bit around 300-600 Hz. This will help reduce that boxy sound and give you a tighter, more focused kick. Boosting the 2-4 kHz range can bring out that nice click from the beater, making sure it stands out even with all those heavy guitars.
For electronic and hip-hop tracks, boosting the 40-100 Hz range can add some nice low-end weight, which is great for driving the rhythm forward. Just be careful not to overdo it, or things might start to sound a bit muddy – especially if your bassline is strong. A high-pass filter below 40 Hz can also help avoid any unwanted sub-bass rumble that might overpower the rest of your mix.
When it comes to acoustic and jazz setups, it’s useful to keep that natural resonance. Try gently boosting the 100-250 Hz range for some warmth and depth while making minimal adjustments to keep the sound feeling organic.
5. Fix any frequency masking
When it comes to mixing your tracks, kick drums and bass guitars often sit in the same frequency range, especially around 40-100 Hz. If we’re not careful, this can create a bit of muddiness in the sound, making it hard to distinguish each instrument. To keep everything sounding clear, it’s a good idea to give each instrument its own space in the mix.
Try boosting the kick drum’s main frequencies around 50-80 Hz and let the bass guitar shine a bit higher in the 100-150 Hz range. You can also try making a cut in the lower frequencies where the bass guitar has been boosted. This way, both will stand out nicely.
If your bass is really taking over the sub-bass area, you might want to cut some of the lower frequencies from the kick drum. This allows the bass to take centre stage without any competition, while the kick still cuts through with its midrange punch.
Using dynamic EQ can also be a game changer for keeping these two from stepping on each other’s toes. By applying dynamic EQ to the bass, you can reduce its low frequencies just when the kick drum plays. This “ducking” method helps keep the low-end clean and punchy.
When you balance the kick and bass just right, both can shine together, creating a groove that supports the entire track beautifully. A useful plugin to help you with this is the Sonnox Toolbox Claro. You can insert it on every channel to view each instrument’s frequency response within a single plugin window, allowing you to identify and target overlapping frequencies on one graph.
6. Balance the whole drum kit
Getting the kick drum to sit nicely within the whole drum kit is crucial. The goal is to have each part of the kit clearly audible, but when balancing, It’s important not to get too focused on one part of the kit. Instead, prioritise how the kit sounds as a whole.
Introduce the rest of the kit into the mix and listen to how the changes you’ve made sit within the whole sound. Listen and look at the adjustments you’ve made to the kick drum. This balance helps everything sound clear and avoids those muddy frequency clashes, particularly in the low and mid ranges.
Creating some space between the sounds using EQ can be really helpful. Try boosting the snare’s attack around 3 kHz to bring it out, and add a little extra “click” to the kick drum around 5 kHz. This way, both the kick and snare can shine without stepping on each other’s toes.
Also, don’t forget about high-pass filtering. Applying a high-pass filter to the overheads can cut out some of those unnecessary low-end frequencies, letting the kick drum take charge in the lower range. You might also want to fine-tune the toms in the low-mid area, so they don’t overshadow the kick’s fullness.

7. Fit the kick drum into the full mix
Now that you’ve balanced the drum kit, it’s time to make sure everything sits well in the mix. In a full band setup, the kick should work alongside the guitars, vocals, and other low-end instruments, ideally complementing them without overshadowing anything.
For rock songs, try boosting the 2-5 kHz range to give the kick some extra punch and presence. This helps it stand out even when guitars and vocals are in the mix. On the other hand, if you’re mixing dance music, focusing on the sub-bass range around 40-100 Hz can give you that deep, driving bassline that gets everyone moving.
Make sure to sculpt your EQ to find the right balance for the kick. If the bass guitar is filling up the lower frequencies, you might want to gently reduce some of the kick’s low end and highlight its midrange attack instead. Also, high pass filtering on instruments like guitars or keys can really help clear up any muddiness in the low end.
As we said before, dynamic EQ can be super helpful when the mix gets crowded. By making dynamic adjustments to the kick’s higher frequencies, you can keep it sounding clear and punchy, even when things get busy. This way, the kick stays strong and vibrant while still blending beautifully with the rest of the mix.
8. Use compression and other effects
The final step is to add compression. The amount you add is up to you, but even just a small bit can level out any volume variations and give you a consistent track. If you set a medium attack and a fast release, you can keep that natural snap of the drum while managing its sustain, which helps it really stand out in the mix.
Saturation is another useful tool to try. It adds warmth and a bit of harmonic richness to your kick, making it feel fuller and more integrated with other elements, especially in busy mixes.
You could also try parallel compression. This trick lets you mix a heavily compressed version of your kick with the original, giving you extra power and sustain without losing clarity. It’s particularly great for rock and electronic music, where you want that driving kick to really shine.
Just remember to use these effects gently so your kick blends beautifully with the bass and other instruments, creating a balanced mix without overpowering everything.
FAQs
How do I make a kick drum sound punchy?
You can make a kick drum sound punchy by emphasising frequencies around 60-100 Hz for low-end impact and 3-7 kHz for transient snap. Use compression to tighten dynamics, EQ to carve space, and layering to combine depth and definition for a punchier sound.
What effects should I put on a kick drum?
Effects to put on a kick drum typically include EQ, compression, and reverb. EQ shapes the tone by emphasising low-end thump or cutting unnecessary frequencies. Compression controls dynamics for consistency, while subtle reverb can add space without losing punch. Layering enhances depth and impact.
How loud should the kick drum be in the mix?
The kick drum should be loud enough to anchor the mix, often peaking around -9 to -6 dBFS. Its level depends on the genre, but you should use reference tracks and metering to balance it relative to the bass and overall mix dynamics.
Final thoughts
Getting the kick drum EQ just right can really make a difference in your mix. Whether you’re cutting out some unwanted frequencies or boosting the low end to add depth, each little tweak can help your drum sit better in the track.
With so many options out there, the best results depend on your genre and personal taste. It’s all about what sounds good to you and fits your track. So don’t be afraid to experiment. Trust your ears, have fun with it, and you’ll find that perfect kick sound in no time!
Want to learn more? Check out some of our other drum and production guides:
How to Record Drums – A Guide to Getting the Clearest Drum Sound
What is EQ in Music? Here’s How to EQ Your Mix
The 15 Best EQ Plugins for All Your Productions


")


0 Comments