

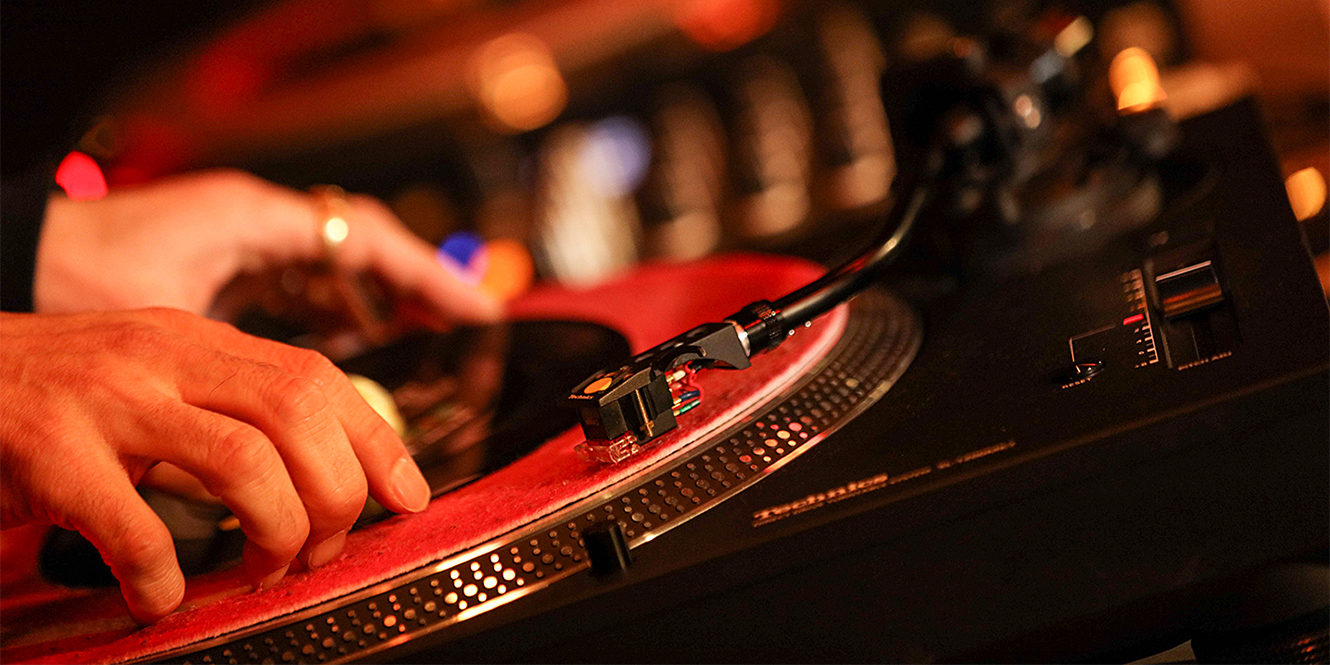

Vinyl was the original format DJs used to entertain a crowd. Long before laptops and waveforms, records were how DJs honed their craft. Mixing vinyl is more time-consuming and difficult than digital DJing – but don’t let that put you off if you want to try it. It takes patience, but it builds skills that carry over into every other way of DJing.
I’ve been DJing with vinyl for five years, playing records alongside digital formats in clubs and at home. In this guide, I’ll teach you how to mix with vinyl records, with tips based on that experience and what actually helps when you’re learning.

In a hurry?
If you’re short on time, here’s a quick breakdown.
- Mixing vinyl takes longer and is harder than digital DJing, but that extra effort builds strong fundamentals. You’ll get better at timing, beatmatching, and trusting your ears.
- You need the right equipment: direct drive turntables, a mixer with phono inputs, proper slipmats, and good headphones.
- Start with records that work well together. Similar tempos and simple, four-to-the-floor house tracks make learning much easier.
- Cueing and beatmatching by ear takes practice. Bad mixes are part of the process, so don’t let them put you off.
- If you stick with it and enjoy the learning curve, mixing vinyl can be one of the most rewarding ways to DJ.
Why DJ with vinyl?
 For me, the main reason I DJ with vinyl is that it’s a lot of fun. It requires far more patience and practice to develop the skill, and that’s part of the appeal.
DJing with vinyl forces you to be more selective with your music. You naturally end up picking records that aren’t as common or widely played as tracks released purely through digital platforms.
I always say that DJing with vinyl does not automatically make you a better DJ. What it does do is make you better at DJing. It really makes you focus on timing, beatmatching, and key-matching. You can’t rely on waveforms or sync, so you learn to trust your ears.
Some people will tell you that vinyl sounds better than digital, but most of the time, that isn’t actually true. With modern setups, there is usually some form of analog-to-digital conversion somewhere in the signal chain.
Most music pressed to vinyl since the mid-’90s will also have gone through some form of digital mastering or transfer. So sound quality alone isn’t the real reason to choose vinyl.
Plus, vinyl is fun to collect. There’s something satisfying about owning physical copies of your favourite tracks, and even though they’re heavy to carry around and not always practical, people are genuinely impressed when you can mix records cleanly in a club environment.
For me, digging for records is one of the most rewarding parts. Sitting in a dusty record shop looking for rare gems at a low price feels very different to buying tracks online.
That’s not to say digital digging isn’t something I do. I find music everywhere. If you enjoy playing a video game, buying the trading cards can be just as fun. Vinyl scratches that same itch.
Sites like Discogs also open up a world of music that goes far beyond the limits of streaming libraries.
How to mix with vinyl records
1. Get the right equipment
 Before you start mixing vinyl, you need equipment that’s actually designed for DJing. Many turntables lack the features and durability that DJing with records requires.
Direct drive turntables are essential. Belt drive decks are fine for listening, but they aren’t reliable enough for mixing.
Your turntables need a pitch fader for fine speed adjustments, a movable tonearm with a counterweight, and a headshell that can mount a DJ cartridge. Without these, DJing with vinyl becomes almost impossible, as your records won’t stay in time, and you’ll find yourself constantly adjusting.
In clubs, you’ll usually find Technics SL-1210s. They’ve been the industry standard for decades, and for good reason, but they’re not the only option if you’re learning at home.
Turntables like the Reloop RP-5000 MK4 or Pioneer PLX-500 are good starting points. They give you the right features without jumping straight to club-level prices.
You’ll also need a mixer that can accept phono signals and amplify them correctly. Some modern turntables have built-in preamps, but this isn’t always the case, so it’s important to check.
A simple analog mixer is often all you need for vinyl. The G4M 4 Channel Rotary DJ Mixer keeps things straightforward and old school, while mixers such as the AlphaTheta DJM-V5 or Allen & Heath XONE:96 offer more flexibility if you’re also mixing digital sources.
If you already DJ digitally, check the back of your mixer or controller. Many modern setups include phono inputs, which means you can plug turntables straight in. In fact, mixing digital tracks alongside vinyl can really help when you’re learning. Looping a digital track gives you time to focus on cueing and beatmatching the record without the pressure of the track running out.
Proper slipmats are important, too. You’ll want slipmats that let the record move freely on the platter, not grippy rubber mats that cling to the platter.
And of course, you’ll need headphones, ideally ones that deliver clear sound and good isolation so you can match tracks accurately by ear. Personally, I use the AIAIAI TMA-2 and the Sennheiser HD 25. There are plenty of other solid options as well, like the beyerdynamic DT DJ 300 PRO X or the RØDE NTH-50.
2. Find records you like
 If you’ve already been shopping for records before buying your vinyl turntables, this shouldn’t be a difficult step.
This is arguably one of the most enjoyable parts of DJing with vinyl. The art of crate digging is addictive, and you’ll find some great music if you put the effort in.
Have a look on Discogs for records made by your favourite artists, and buy the vinyl releases of songs you already love. If you’re in the mood to find new music, a good place to start is local record stores.
Try to find a set of records that you think share a similar tempo, genre, and style, and that will fit nicely together in a set.
I personally recommend learning to DJ on vinyl turntables with house music, as the four-to-the-floor beats are usually the easiest to follow and match. Mid-range tempos of around 120 to 135 BPM are also easier to distinguish by ear.
That doesn’t mean you can’t try mixing faster or slower breakbeat music like drum and bass, two-step garage, or electro, but having a few simple house records allows you to focus on the basics without making things harder than they need to be.
Breakbeats have more scattered drum patterns and don’t stick to the traditional four-to-the-floor cadence. They usually still sit within a 4/4 time signature, but they’re harder to mix cleanly when you are starting out.
Most records will have multiple tracks on them, so even if you buy a record for one tune, the others may grow on you over time.
3. Set up your turntable properly
 Before you start mixing records, it’s important to make sure your turntables are set up correctly.
While you’re learning, it’s best to have your turntables set up horizontally, rather than sideways or vertically. Sideways and vertical setups (known as battle mode) are more commonly used by hip hop and scratch DJs.
First, make sure your turntables are sitting on a level surface. This ensures the needle sits correctly in the record groove – most turntables have height-adjustable feet to help with this.
Once the decks are level, you can move on to setting up the tonearm. This involves fitting the counterweight, balancing the tonearm, setting the correct tracking force for your cartridge, and adjusting the anti-skate.
Most DJ cartridges track between two and three grams, but you should always check the manufacturer’s recommendation.
Once the tonearm is set, place the slipmat onto the platter and connect the turntable to the mixer. Make sure phono is connected to phono and line is connected to line, as sending a line level signal into a phono input can damage equipment.
Once this is done, your turntable is set up correctly and ready to use.
4. Cueing the record
 Put the record on the platter and move the tonearm to the start of the record, or to the track you want to play. As mentioned earlier, some records have two or three tunes on one side, so it’s worth checking the record sleeve or centre label to see where each track is located
Tracks are usually labelled as A1, A2, B1, or B2, depending on the side and position. You’ll generally be able to tell where tracks start and finish by the spaces between the grooves. Once the tonearm is at the start of the track you want, press play on the turntable.
On your DJ mixer, press the cue button on the channel the turntable is plugged into so you can hear the record in your headphones.
Make sure the pitch fader is set to zero. This gives you a neutral starting point. Once the record is playing, listen carefully for the first kick drum in the main rhythm.
If the track has a long intro, wait until there is a clear and consistent drum pattern before trying to beatmatch. When you’ve found the first kick drum you want to start from, stop the record with your hand. Don’t put too much pressure on the record, and don’t try to stop the platter from rotating.
The slipmat allows the platter to rotate freely underneath the record while you cue it. Your hand should only be controlling the record.
Once you’ve found the exact point you want to start from, gently rock the record back and forth underneath the tonearm. This process is known as cueing the record.
It’s a good idea to practise this without any other music playing at first. Once you’re comfortable, you can try cueing alongside another track.
Most dance music is written in a 4/4 time signature. When cueing alongside another track, rock the record in time with the four-count of the track that is playing, and release it on the 1 count.
If everything lines up, the record should play in sync with the other track for a short amount of time. This sets you up for the next step, which is beatmatching.
5. Beatmatching
 Beatmatching is the most important step when it comes to getting two tracks in time with each other. Don’t be disheartened if you can’t do this straight away; it’s a long learning curve, and it only really comes with practice.
To beatmatch on a turntable, you need to cue the record and release it in time with the track that’s already playing. Once you’ve done that, use the pitch fader to get the record playing at the speed it needs to match the other track.
On most turntables, pushing the pitch fader upwards, away from you, slows the track down, and pulling it downwards, towards you, speeds the track up. The pitch range is usually plus or minus 8%, although this can vary depending on the turntable you’re using.
Once you let go of the record after cueing, listen carefully to how the two tracks sound together. If they’re not matched properly, you’ll hear the beats drifting quite quickly.
It can help to listen to each track on its own in your headphones. This makes it easier to work out which track is running faster or slower.
Once you’ve got an idea of what’s happening, adjust the pitch fader to roughly where you think it needs to be. If the track drifts out of time very quickly, move the pitch fader closer to where you think it needs to be, then re-cue the record and try again.
Because the pitch fader is now closer to the correct position, the tracks should stay in time for longer. This makes it easier to make smaller, more accurate adjustments.
You’ll probably need to repeat this process a few times. Each time you do, the tracks should stay locked together for longer.
As a beginner, a good target is getting two tracks to stay in sync for around 30 seconds. That’s more than enough time to make a clean transition.
Beatmatching on vinyl takes time, patience, and repetition. The more you do it, the more natural it starts to feel.
6. Mixing in the record
 Once you feel like you’ve managed to get the record matched to the speed of the track that’s playing, you’re ready to start mixing it in. This is where everything you’ve practised so far starts to come together.
Cue up your record and wait for the start of a new phrase in the track that’s playing out. This could be the build-up to the last drop, or the start of the outro, which are usually the easiest places to bring a new track in.
Cue the record just before the phrase change, and release it on the first beat of the new phrase. Let a couple of bars play with the channel fader down, and listen in your headphones to make sure everything is still in time.
Once you’re confident the tracks are matched, start to bring the record into the mix by slowly raising the channel fader. There’s no need to bring it all the way up straight away.
At this point, you can start blending the two tracks together with small EQ adjustments. It’s usually a good idea to cut the low EQ slightly on the incoming track, so it doesn’t clash with the bass of the track that’s already playing. Low frequencies are the most powerful part of the mix. Letting two basslines play at full volume at the same time can sound messy.
When it feels right, reduce the bass on the outgoing track and bring in the bass on the incoming one. As you do this, you can bring the outgoing track’s fader down slightly, while bringing the incoming track up fully.
If your mixer has filters, they can be useful here. Once the new record is playing out in full, you can bring the outgoing track’s fader all the way down. At that point, the transition between tracks is complete.
7. Keeping the record in time
 Once you start getting comfortable with transitions, you can keep records playing alongside each other for longer. This allows for smoother, more drawn-out mixes and gives you more room to be creative with your selections.
If you choose tracks that work well together, let them play in tandem for as long as you like. You can adjust levels and EQ to blend them together harmonically, rather than rushing the mix. To do this, you need to keep both records running at the same speed.
However, even if you’ve beatmatched well, records can drift over time. Turntables can suffer from wow and flutter, and their speed can wander slightly. This can happen on any setup. There are a few ways to correct this without touching the pitch fader. These small adjustments become second nature with practice.
You can gently nudge the platter using the side where the stroboscopic dots are. Pushing it forward slightly will speed the record up, and applying gentle pressure will slow it down.
You can also do this directly on the record itself. Very light pressure on the centre label, or the blank space between the label and the groove, can help bring it back into time.
These movements need to be subtle. Small adjustments are usually enough.
If you find yourself having to nudge the record too often, it may be a sign that the pitch fader needs adjusting. In that case, make a very small pitch change to bring the tracks closer together.
The pitch fader is still there to be used. You just want to be careful not to overcorrect and derail the mix.
Keeping records in time is a balance between pitch control and physical adjustment. With practice, you’ll start to hear when a track is drifting before it becomes obvious.
8. Keep practising and don’t worry about bad transitions
 Nothing gets you better at mixing vinyl than practice. Repetition over time is what really hones your skills. Bad mixes are going to happen, especially when you’re starting out. That’s completely normal, so don’t let it put you off.
If a mix goes wrong, don’t dwell on it too much. Move on to the next record and keep going.
Everyone who DJs with vinyl has been through this stage. Clean, confident mixes only come after a lot of trial and error.
If you’re struggling to get the hang of it, try mixing records out loud for a while. This can help you understand how the two tracks interact without the extra pressure of cueing in headphones. Once things start to make more sense, you can bring the headphones back in. Over time, everything will begin to feel more natural.
The most important thing is to keep going. The more time you spend mixing vinyl, the more confident and controlled it will start to feel.
Vinyl DJs you should follow
Watching experienced vinyl DJs is one of the best ways to improve your own mixing. It helps you understand track selection, phrasing, and how confident vinyl mixing should look and sound.
Kirollus is a disco DJ who plays vinyl almost exclusively. Their sets are funky, soulful, and fun, and show how far strong selection and clean mixing can go.
Quest plays techno, electro, hard house, and trance. If you’re into heavy club cuts and rare music selections, Quest is a good DJ to follow.
For progressive, wonky tech house and gritty electro, watch Sugar Free’s sets. She’s very versatile behind the decks and has a deep, well-curated record collection.
LTJ Bukem, on the other hand, is one of the original vinyl DJs who has stayed true to the format. His jungle and drum and bass sets are a masterclass in long blends and subtle control.
Head of Mindhelmet, a tech house label focused on up-and-coming artists, Truly Madly is also known for carrying a bag full of timeless records that work in a wide range of settings.
If you’re looking to follow one of the greats, Sven Väth should be on your list. His marathon vinyl sets, particularly in Ibiza, show what’s possible with careful pacing and flow.
Finally, I also recommend checking out Eris Drew, who has an unbelievable level of skill on vinyl. She plays across house, techno, and harder styles, cutting, scratching, and sampling records.
FAQs
What do I need to mix vinyl?
Mixing vinyl requires direct drive turntables with pitch faders, a DJ mixer with phono inputs, proper slip mats, DJ cartridges, and good headphones for cueing by ear. You’ll also need records, a stable surface, and time to practise beatmatching properly.
Is mixing vinyl easy?
Mixing vinyl is a skill that takes time, patience, and consistent practice to develop, especially when learning to cue and beat match without visual aids. It can feel difficult at first, but the fundamentals become second nature the more time you spend behind the decks.
Is stacking vinyl a good idea?
Stacking vinyl records causes warping, ring wear, and long-term damage, making it a poor choice for storing records you want to keep in good condition. Vinyl should always be stored upright, in sleeves, on a flat and stable surface.
Rewind
So, spinning back this article, we’ve covered why DJs still choose vinyl, the equipment you need, and how to mix vinyl effectively, from setting up a turntable to cueing, beatmatching, and mixing records together.
Hopefully, you now know how to mix with vinyl records – all there’s left to do is give it a go and enjoy the process of learning it! It can be challenging at times, but it’s also a lot of fun.
If you want to keep learning, check out more DJ guides and articles over on the Gear4music blog.


0 Comments