

So, you’ve decided to put on a show in an outdoor space or run an event outdoors, or maybe you simply want to start your own mini-Glastonbury in your backyard! You need to know how to set up an outdoor PA system first. Fortunately, it’s actually easier than you think if you have the right gear!
We’ll show you how to set up an outdoor PA system and discuss the gear you need, whether active or passive speakers are best, and the pros and cons of wireless systems. We’ll also give you some tips on getting the best sound possible.
This is a step-by-step guide to setting up an outdoor PA system for smaller-style events, open mic nights, bands, and DJs rather than full festival scenarios! I’ll also assume that you have access to power rather than using a generator.
But first, here are some key considerations before you even purchase equipment.

The most important step – buy decent PA gear first
As an event organiser, venue owner, or sound professional looking to run your own live events, you’ll know that hosting an outdoor event can be pretty tricky to get right when it comes to achieving decent audio that is crisp and clear.
Outdoor events are an entirely different animal when it comes to mixing sound and choosing PA systems compared to indoor events, especially when you throw elements like wireless microphones and power considerations into the mix. But we’ll cover everything you need.
The most important takeaway from this article is that you need the best sound possible.
That’s why it’s super important to invest in quality outdoor PA systems, mixers, and wireless/wired mics from reputable brands like Shure to ensure your event is as successful as it should be.
So, I’ll also cover a small list of gear that you need, too!
How loud does my PA system need to be?
When researching how loud your PA system needs to be for an outdoor setting, think of it like this: a venue, cafe, or bar needs 100 to 300 watts as your patrons will likely be fairly close to the speaker system and just want something nice to listen to.
A small venue with singer-songwriters and DJs needs 300 to 900 watts as you want the performers to be heard.
A venue with live bands playing outdoors needs anything over 1000 watts as you’ll be competing with a snare drum and other musicians.

What equipment do I need to set up an outdoor PA system?
How much gear you need depends on the event, but the most common equipment for an outdoor PA system is a mixing console, main speakers, subwoofers, monitor speakers, dynamic microphones (wired or wireless), speaker stands, cables, and extension cords.
Now let’s dig into the different gear lists based on your scenario!
I’ll be looking at the following:
- Outdoor PA system for a pub/café/bar/restaurant with the potential for outdoor performances, karaoke, or music in the background
- Outdoor PA system for a venue that also has live singer-songwriters
- Outdoor PA for a full band set up
Each environment will have some key differences and might require some additional equipment.
An outdoor PA system for a café or small venue, school, or church outdoor service
If you’re setting up an outdoor PA system for a small venue in which there’s just music in the background, some karaoke, or a live vocalist singing to a backing track, a single dynamic microphone through a powered speaker with an onboard mixer will be fine.
This setup below will also be ideal for the likes of a local charity organisation hosting a fundraiser in a park or a school putting on an outdoor performance – or even sports day. If you’re looking for a PA for a church outdoor service now that the weather is getting nice here in the UK then this is all you really need for an outdoor PA system.
Gear you need
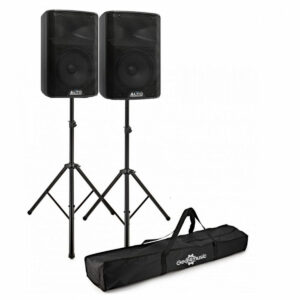 PA speakers: I suggest going with active PA speakers here as you can link two together and you won’t need a mixer to power them. You just plug them into the wall. If you go for passive speakers, you’ll need a mixer.
Pro tip: Make sure you choose PA speakers with a power rating relative to the venue. As a general rule, you’ll need something around 100-300 watts for this kind of environment.
Mixer: Most outdoor PA speakers have a mixer built in. They’re designed to be portable, so you won’t really need a standalone mixer in this scenario. But check out the FAQs at the end of the article if you’re unsure about mixers.
Microphone: Of course, you need a good quality microphone. I suggest something like the Shure SM58 dynamic microphone as it will last forever and withstand many drops and years of (ab)use. If you want to go wireless, the Shure BLX288/SM58-K3E Dual Handheld Wireless Microphone System comes with two microphones and a wireless reliever that’s essentially plug-and-play!
Audio cables, stands and XLR leads: Don’t forget the necessary cables to connect the mixer to the speakers (if you’re using passive speakers), an XLR to connect the speakers to each other, and the XLR leads for your microphones.
Power strips and extension cords: For powering the equipment.
Things to consider
- Always check the microphone levels on the PA speakers before you let anyone speak as the sound level will be very different to what it is with ambient music
- Always have a spare mic on hand
- It’s a good idea to buy two speakers rather than one as you’ll have better sound quality and dispersion
- For this scenario, a powered or active PA speaker set will suffice as you probably won’t need to mix too much
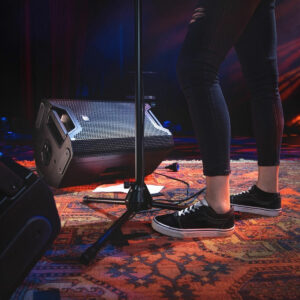
An outdoor PA system for a singer-songwriter, open mic, or DJ set
For a singer-songwriter or DJ scenario, you’ll need a mixer as you’ll have to connect multiple instruments or mics to the speakers. You’ll also need powered or active PA speakers, a subwoofer (for DJ sets), a DI box if the musicians are using a keyboard or bass, two or more microphones and the necessary XLR cables.
Gear you need
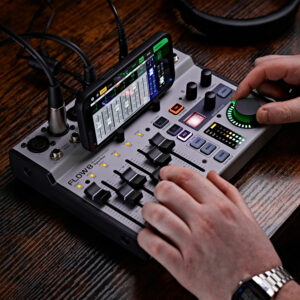
Mixer: A medium-sized mixer (8-16 channels) with enough inputs for microphones, instruments, and DJ equipment.
In this scenario, you’ll need a mixer as you’ll have multiple instruments, perhaps two acoustic guitars, a bass, and two vocalists who need to be heard through the PA system. As most active PA systems only have 2-3 connections, a mixer is necessary to connect instruments and mics to the PA. Plus, you’ll need to be able to actually mix the sound while the performers are playing.
Powered speakers: Two high-quality powered speakers with stands for stereo sound dispersion. Choose speakers with a power rating suitable for the performance space.
Foldback/monitor speakers: You’ll also need a monitor speaker or two for the performers to hear themselves.
Subwoofer: For DJ sets where you need to hear the bass, a powered subwoofer for added low-end frequency response, is essential.
Microphones: It’s always a good idea to have at least two vocal microphones with stands and XLR cables. Again, the Shure SM58 mics are the industry-standard option here as they’re built to withstand decades of use and are what performers expect to see at venues.
Direct input (DI) Box: It’s helpful to have a DI box for your bass guitars or keyboards as you don’t mic these instruments up. A DI box lets you connect these instruments directly to the PA system.
Audio cables: Necessary cables to connect the mixer to the speakers and instruments.
Power strips and extension cords: For powering the equipment.
Things to consider
- Do a speedy sound check to get those mic and speaker levels just right before the performance – stand back from the PA around where the audience will be to make sure they’ll be able to hear the performance.
- Position mics around 1-2″ from voices and about 4-5″ from acoustic instruments.
- Let the performer’s natural sound shine and simply boost it with the PA system.
- Got a big space or lots of people? Two main speakers can help cover the area. Add a subwoofer if you feel the mix is lacking bass or power.
- If you need more than two mics or instruments connected at the same time, an external mixer is essential.
- No instrument input on the PA speakers? No problem. Use a DI box to hook up an acoustic guitar or keyboard to an XLR mic input.
- Have backup mic stands – you’ll always need more than four!
- If you can’t afford a stage monitor at this time, some PA speakers feature an AUX output that you can use.
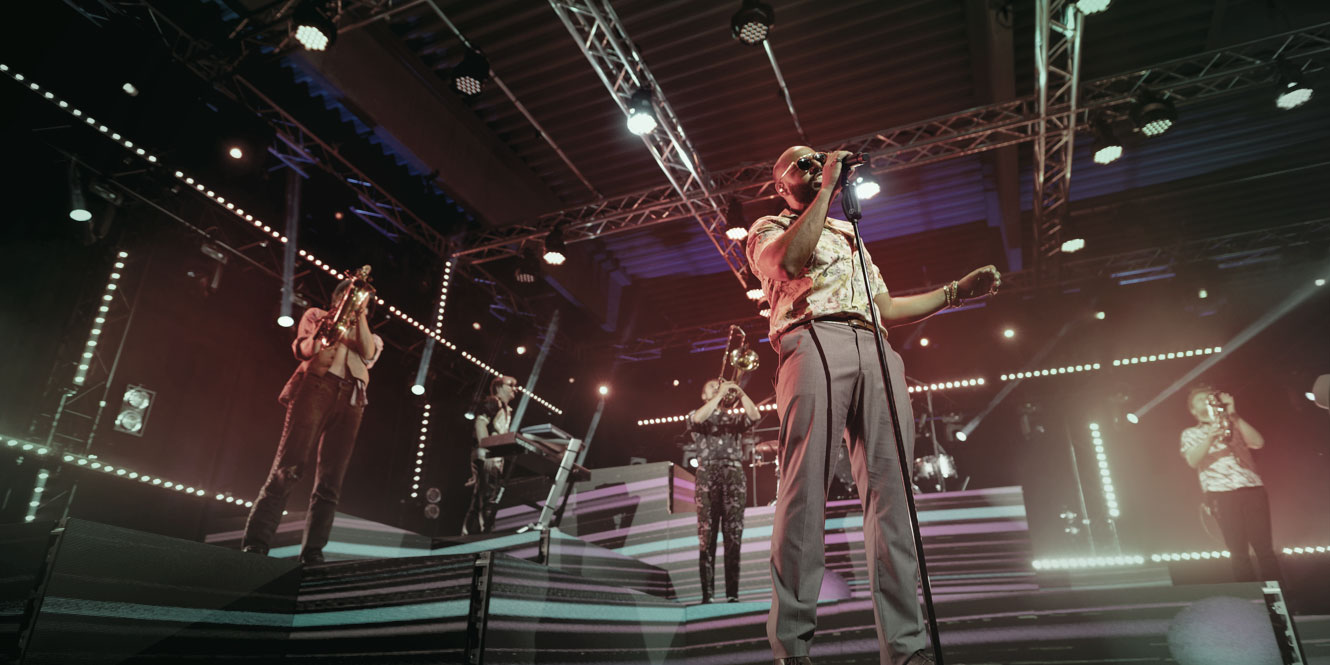
An outdoor PA system for a full band
The equipment you need for a live band is as follows: a mixing desk with 16-32 channels, at least two PA speakers with upwards of 1000 watts of power, four dynamic microphones for vocals, dynamic mics for the snare, guitar amps, and tom drums, kick/bass drum mics, a subwoofer for low frequencies, a DI box to connect bass/keyboards, speakers stands, and all the associated XLR and power cables.
Gear you need
 Mixer: A large mixer (16-32 channels) with enough inputs for all the instruments, microphones, and other audio sources is absolutely essential here. Make no mistake – you’ll need additional channels as you never know how many musicians will turn up to play your gig!
Plus, you not only need to mix the instruments, but you also need to mix the monitor speakers here, too!
PA speakers: You need at least two or more high-quality powered speakers or active speakers with a power module and stands for stereo sound. A PA system will make or break your outdoor gig – so get something with at least 1000 watts.
Subwoofers: One or two powered subwoofers for added low-end frequency response are essential for a live outdoor PA system for a full band. Low-end frequencies get completely lost when you play a gig outdoors, so investing in some good-quality subwoofers will help your live show be the best it can be. Your bass player will thank you.
Stage monitors: You’ll need two or more powered stage monitors for the band members to hear themselves. You need at least one for the vocalist and one for the additional musicians on stage. You can get away with just one (I have played many gigs where I have only had one) but the singer will always need the monitor more so than other musicians. So it’s best to get at least two, perhaps even one more for the drummer.
Microphones: You’ll need multiple vocal and instrument microphones with stands and XLR cables. Aim for dynamic mics again, like the industry-standard Shure SM58, and consider wireless mics if the stage is becoming too cluttered with cables.
DI boxes: You’ll need DI boxes for connecting instruments like keyboards or acoustic guitars directly to the mixer – you can’t (and shouldn’t really because you can’t hear it) mic up a bass cab.
Audio cables: Obviously, you’ll need the necessary cables to connect the mixer to the speakers, instruments, and microphones. Always buy twice because I can guarantee they’ll go missing at some point!
Power strips and extension cords: For powering the equipment. Make sure you get high-quality surge-protected extensions.
Things to consider
Remember, the two most important factors here are PA speaker power and mixing desk inputs, but there are also some other points to consider when setting up an outdoor PA system:
- You need PA speakers with enough power to handle the band – aim for 1000 watts and up – anything less and you risk not being heard.
- All these channels (instruments/vocalists) can add up quickly, so make sure you choose a mixer that can accommodate everything. In a live band situation in an outdoor setting, a larger mixer with added channels for mics, aux sends for stage monitors, and a stage box (sometimes known as a stage snake) can simplify the setup process and make sure you have enough inputs for the full band. Aim for a mixer with 16+ channels.
- Don’t try and turn guitar amps all the way up to get a good sound, as they’ll drown out everything else and cause the monitor speakers to feedback. Turn them down and use the microphone and PA system to sculpt a good sound.
- Always use a DI box on bass guitar and keyboards so you can connect it to the PA and sculpt the sound. Don’t mic up a bass amp as the sound will get lost in an outdoor setting.
- Getting feedback from the monitors? Move your singer and the mic back from the monitor speakers.
- Always use speaker stands pointed slightly inwards, toward the crowd.
- Always soundcheck. Start with drums, then move on to guitars, then vocals. This lets you create a main mix for the audience, then move on to monitor mixes for the band.
How to set up a PA system in 7 steps
Now you’ve got the equipment, this is how you set up your outdoor PA system in 7 steps.
1. Consider your room layout/environment
 Before you even consider purchasing any gear, think about what type of environment you’re creating an outdoor PA system for. I can’t stress this enough.
The size of the outdoor venue, area coverage, layout, and type of event, whether it’s for a singer-songwriter, open mic nights, a full band, a presenter, or karaoke setting or even just an area where you need ambient music, will all affect the equipment and wattage of PA speakers you’ll need.
Let me share some insights I’ve gained over the years!
Size of the outdoor venue
The size of your venue will dictate the power and coverage you need from your PA system – you want everyone to hear the music. So the higher wattage, the more people will hear it from a distance.
We’ll get into the different environments and settings below, but a smaller, more intimate setting – like a garden concert, a beer garden, or a small outdoor wedding with an acoustic duo – may only need a compact PA system with around 100-300 watts and a built-in mixer and a single SM58 microphone – ideally a wireless one.
A larger setting on the other hand, like an open mic night, sports event, or a full band will need a bigger PA system. Your PA speakers will need to be in the range of 1000 watts or higher to ensure everyone can hear the music clearly – and you’ll need a mixer for multiple channels.
As a rule of thumb, the larger the venue, the more power you need.
How do I determine area coverage?
The coverage area of a PA system plays a significant role in determining the type and number of speakers you’ll need.
Typically, for outdoor PA systems that aren’t major festivals, you’ll achieve good sound coverage with 2-4 PA speakers and a subwoofer. It’s almost impossible to get consistent coverage in an outdoor setting due to wind, lack of acoustic treatment etc, so to help with that, always choose a PA system based on power settings. The higher the power, the more people will hear it.
In a gig setting, wide coverage is essential for good sound distribution and to reduce dead spots where the sound isn’t as clear. I’ve found that placing the two front-of-house speakers (facing the crowd) on stands and angling them slightly inwards towards the crowd helps focus the sound.
If you have an outdoor venue with multiple seating areas, fly the speakers on the wall and angle them down towards the crowd for even coverage.
Pro tips:
- The larger the setup, the higher the speakers need to be
- The louder the speakers, the better the coverage – choose PA systems based on wattage
What type of event do you need your outdoor PA for?
Are you using your outdoor PA for ambient music or full live bands? Is it for a DJ set one day and a wedding band the next? Is it for acoustic duos or open mic nights?
The type of event you need your outdoor PA system for will directly impact the gear that you need. I break down all the equipment you need by environment earlier in the article.
In summary, a solo singer-songwriter or presenter will just need a simple PA system with one or two speakers, perhaps a mixer, and a good dynamic microphone like the Shure SM58 or Beta 58A – simple.
A full band setup, however, will need a way more extensive PA system with multiple speakers, a larger mixer with enough channels for all the instruments and vocals, stage monitors so the band can hear themselves, multiple microphones for vocals and instruments, DI boxes, and a subwoofer or two.
Consider the types of events you plan to put on and then figure out what gear you need from there!
2. Position your system
 It goes without saying but, strategically positioning your PA system so everyone can hear the sound, even outdoors is vital. If you’re positioning your sound for a live band, the major goal here is to ensure that everyone can hear what’s being played without any feedback.
Tip 1: Always use speaker stands as the elevated height of the speakers will make sure everyone can hear the music, not just the people in the front row.
Tip 2: Always place the microphone and fold-back speakers behind the main FOH speakers as this will prevent feedback.
Tip 3: If you’re a wedding duo or acoustic act, I’d still advise getting speaker stands, but if you must place the PA speakers on the floor, always place the speaker in front of the microphones. The PA system should never be behind you otherwise you’ll get that horrible microphone feedback.
Tip 4: When positioning your PA system, always angle it slightly inward to face the crowd.
Why do I need to do this? Proper speaker positioning enhances the listening experience for everyone, reduces the chance of feedback, and ensures you get a clear and balanced sound for your audience.
3. Mixer placement
 At this point, you’re probably wondering where you place the mixer in an outdoor PA.
You have two options depending on how big the setting/event is.
Option 1: For a small event, open mic, or acoustic duo, the side of the stage is OK.
Option 2: For a large, full band mix, the middle of the audience is essential.
Ideally, you’d want the mixer smack dab in the middle of the audience, so you can hear exactly what they’re hearing while you’re working your magic. For a live band setting this is essential.
If you have a smaller event, the best spot for the mixer is off to one side of the stage as you can monitor changes or respond to requests from the performers quickly, and it keeps all your gear close by and saves you from running crazy long cables.
If you have a bar or beer garden and don’t want the mixer in full view – somewhere where the public can’t get to is a good idea as this prevents someone from accidentally making changes or spilling anything on the mixer.
Top tip: If you’re running an outdoor gig, run the cables directly down the middle and tape them down, then tape some carpet or rubber mats over the top so people can’t trip over them.
4. Power settings
Now you’ve got your placement, it’s a good idea to check you actually have power before completely connecting your PA systems and inviting acts to play. Use a power outlet tester or turn on your speakers to ensure a stable power source. Ideally, use high-quality extension cords with a surge protector to protect your PA systems in the event of a power outage, power surge, or someone spilling a drink on your PA system.
Top tip: Make sure you have enough power outlets for all your gear as well as additional equipment any bands or artists may bring with them.
Making sure you have a reliable power source prevents unexpected outages or equipment damage during your event, which lets you relax and focus on getting the sound right, which brings me to my next point…
5. Connect the mixer to your speakers
It’s now time to connect your speakers to the mixer. I always reserve the main outputs of the mixer for the main speakers as that’s the most important sound.
So, grab an XLR cable and connect the left output on the mixer to the input of the left speaker. Then, use another XLR cable to link the right output of the mixer to the right speaker.
Now, if your mixer comes with 1/4-inch outputs, no worries! Just get yourself a 1/4-inch TRS to XLR adapter, which will let you convert those outputs to XLR, and you’re good to go.
Top tip: do a pull test to make sure they’re connected properly. You don’t want anything falling out mid-set!
If you’re running monitor speakers for the band or performers, hook them up with the aux outputs on the mixer. I like using aux 1 for one monitor and aux 2 for another and labelling them with some tape and a Sharpie pen for reference.
Top tip: Turn the mixer on first, and then the speakers. Doing it in this order helps you dodge any pesky pops or clicks that might end up hurting the precious PA speakers which you’ve just bought. The same goes for mics – reduce the volume and increase gradually when you connect them!
6. Connecting your mics and inputs
Connecting mics and wireless mic systems
 If you’re connecting a dynamic microphone directly to the mixer, you just need an XLR cable. I always recommend dynamic mics for live PA systems, especially where multiple people are using them as they’re just so hard-wearing.
If you’re connecting a wireless microphone system then these connect via an XLR connection too, except the XLR cable goes to the transmitter box. We’ve actually compiled a list of the best wireless microphone systems for festivals which will help you choose!
Line Level Input (Laptop, Bass, Keyboard, Smartphone, DJ Turntable)
You might want to run smartphones or laptops or a DJ turntable into your outdoor PA. All you need here is a 3.5mm to dual 1/4-inch adapter.
You can connect to your mixer via any of the 1/4-inch line inputs, but it’s a good idea to use a stereo input as you’ll be able to control both the left and right channels with just one channel strip on the mixer rather than taking up multiple strips.
However, these adapters are only useful if you’re close to the PA system, so if you plan on using line-level instruments on a stage while you mix from afar, you’ll need a DI box.
Direct Box (DI Box)
A DI box (also known as a “DI,” which is short for “direct input” or “direct inject”) is an essential piece of kit for any PA system. You need it to connect keyboards, DJ turntables, or bass guitars as you don’t mic these up. Just plug your instrument into the DI box and then plug the DI box into the mixer via an XLR cable – simple.
Playing test music
I’ve played a lot of gigs and every PA engineer I work with plays test music before every show. It’s that important.
I recommend doing a PA “soak” test, which is playing a particularly intricate song full of different dynamics to spot any dead spots in the sound. I recommend Faith No More’s “Stripsearch” as it has so many different sonic qualities that you’ll quickly figure out if your PA system can handle any type of live band.
But any song you love will do. You just need something your ears are used to hearing so you can make adjustments if something sounds ‘off’.
7. Mixer settings
 Ok, you’ve got everything set up. The first step in setting up the audio on a mixer is to “normal” the settings. This means setting them to their default factory settings. Start at 0 or flat.
Most active PA systems have specific settings for music, speaking, and live bands – so if you don’t have a mixer, you can use these. However, if you’re using a mixer, just set them to factory settings first or roll everything back to neutral and start mixing from there.
Then it’s up to you to create a good balance between sound levels, EQ, and effects for each input source. Again, start with basic levels and EQ, then make adjustments according to what the band needs.
Set up gain structure
What is gain structure?
In simplest terms, setting a gain structure or gain staging is where you set your sound system to achieve the optimal signal-to-noise ratio. You basically find your system volume limit before noise or distortion starts to creep in.
This is how you set your gain structure!
Step 1: Start with everything at 0, or the master fader to unity, which is 0dB (no sound). You have your test music hooked up, so now you unmute it and start to turn up the music channel fader until you see a signal, this is the rising and falling green lights.
Step 2: Each mixer will have a preamp knob at the top of the channel strip. Look for this and gradually adjust until the metre averages about -5dB. This gives your mixer room if the vocalist or drummer suddenly plays something really loud and the sound won’t distort.
If you’re not seeing any signal on the metres just yet, don’t panic. You might just need to hit the “L-R” or “Main” button at the bottom of the channel strip to send the signal to the main output.
Why start with a low gain setting? By starting with a conservative gain setting, you can gradually increase the gain until you achieve the desired sound level without distortion or feedback. By using a lower gain setting at first, you can also ensure your sound doesn’t distort if a singer screams or yells really high.
Setting up the gain structure correctly helps maintain consistent sound levels across the entire frequency, reduces the chance of distortion, and prevents equipment overload which makes sure everything actually sounds good!
Adjusting your speaker levels
Now you have a good gain structure, you can introduce volume. With your test music playing, slowly turn up the volume knob on the PA speakers, not the mixer. Get the levels to an appropriate volume for your environment, but always give yourself a little more volume than necessary here as you can then adjust levels on the mixer.
You’re now ready to start mixing.
Fader unity gain
Fader unity gain is another term for setting the faders to 0dB and means that it won’t be boosting or reducing the signal. This is known as the unity gain position. You are allowing the sound signal to pass through without adding any unwanted gain.
Always start at 0dB here and adjust only if you need to.
Top tip: For instruments, you probably won’t need much gain, it’s usually just for vocals. But in an outdoor setting, you may need more gain on the kick, snare, or bass to really help push those lower frequencies around outside.
Setting your microphone preamp gain
Now you have your channel faders to unity or 0DB, start by adding preamp gain at the top of each channel to give them more “life”. Remember, gain is power or “life”, volume is “loudness”.
In the context of a PA system, gain refers to the amplification of a signal’s input level or line level, while volume refers to the overall loudness of the sound coming from the speakers after all adjustments have been made. Gain amplifies the signal making it stronger and slightly more distorted, volume makes it louder.
Keep adding gain to each channel until it sounds loud enough and you can hear everything properly.
Top tip: gradually adjust gain, then volume, gain then volume, repeat. Don’t turn gain all the way up because when you increase the volume, you’ll just get a louder, distorted sound.
Ringing out the speakers
 In simple terms, the whole point of ringing out speakers on a PA system is to spot the point of feedback and eliminate it. As you start to introduce gain, you’ll gradually get feedback, so this is vital to get right before the gig.
Here’s how you ring out speakers and spot feedback areas.
Step 1: Set microphones back from speakers. The further the PA speaker is away from the mic, the more gain you can add. This is why I told you to place FOH speakers in front of the performer not behind.
Step 2: Keep microphones pointed away from monitor speakers and use a high-quality dynamic mic with good off-axis rejection. The Shure Beta range is good for this.
Step 3: Slowly raise the volume of the input signal (instrument/mic) until you start to get some feedback. It’s essential to be cautious and avoid sudden boosts as they can damage the speakers and annoy the audience.
Step 4: Use the equaliser (EQ) in your mixer to pinpoint the frequencies causing the feedback – look for the spikes on the mixing desk. If you keep getting feedback, switch on your high pass filters as these allow higher frequencies to pass through without causing feedback. You can then reduce the offending frequency until it goes away.
Step 5: Once you’ve figured out which frequencies are causing feedback, use the EQ to lower their levels just enough to eliminate feedback, but not so much to affect the overall sound quality. You still want power and volume – if you cut too much you’ll lose all the life of the PA system.
How does a PA system work?
A PA (public address) system, whether outdoor or indoor, works by converting sound pressure into an electrical signal, usually from a microphone, and then amplifying the signal and sending it to a mixing desk, which then sends it to the speakers so everyone can hear it.
Converting sound pressure to voltage
The easiest way to explain how PAs convert sound pressure to voltage is by using an example of a microphone. When you sing or play into a microphone, it causes sound pressure, which then vibrates the diaphragm of the microphone. The diaphragm turns that sound pressure into an electrical signal, creating a voltage that mirrors the original sound pressure.
So if you sing or play harder, the sound is louder. This electrical signal, commonly referred to as analogue audio, is sent to the mixer (or speakers) and we can then mix or manipulate that sound.
Gain staging
We covered this above, but In simplest terms, setting a gain structure or gain staging is where you set your sound system to achieve the optimal signal-to-noise ratio. You basically find your system volume limit before noise or distortion starts to creep in.
How do PA mixers work?
In short, PA mixers allow you to control and adjust all audio signals coming from the stage before sending them to the speakers. Mixers are the heart of any PA system or the control centre of your entire operation!
Mixers come in various sizes and can have as little as two channels on analogue models to 32+ channel digital mixers with advanced signal processing capabilities.
In a nutshell, mixers allow you to combine multiple audio signals like vocals, instruments, and backing tracks, adjust the levels of each, add EQ and effects, and manage the sound that is being projected to the audience. They also allow you to adjust what the performers onstage can hear, too!
Some mixers, but not all, also have onboard recording features and built-in DAWs which are ideal for recording live shows or getting down tracks in the rehearsal room.
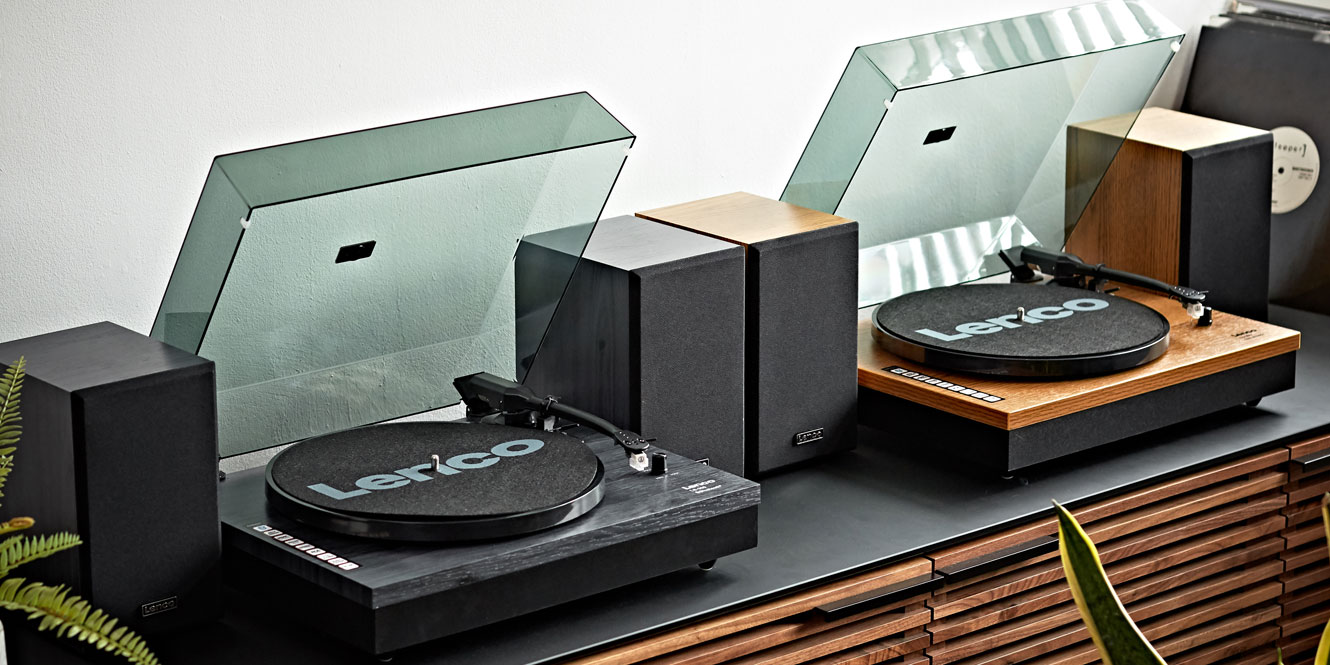
Passive vs. active speakers
If you have passive speakers, you need a mixer with a power amp built-in. Active speakers, on the other hand, already have a mixer and power amp built into them. But it’s a good idea to have a mixer if you’re mixing more than two sound sources.
I’ll explain further.
There are two main types of speakers: passive and active. Passive speakers need an external amplifier and power source – usually from the mixer, whereas active speakers have a built-in amplifier and can just be hooked up to the wall plugs in your venue.
Pros and cons of passive speakers
You’ll find that passive speakers are often less expensive and lighter as they don’t have a mixer and amplifier inside them, but they’ll require some extra equipment like a power amplifier or mixing desk. You’ll likely want passive speakers if you have a good mixing desk already.
Pros and cons of active speakers
Active speakers, also known as powered speakers, already have built-in amplifiers inside them, so you don’t need additional equipment like a mixer if you’re using them as an outdoor PA system for a wedding duo or open mic night. They can be more expensive and you’ll need to run a power cord to each speaker.
All in all, active speakers are also far less prone to feedback and distortion compared to passive speakers. They’re also a lot easier to deal with if you’re a beginner.
FAQs
Do I need an amplifier for my PA system?
If you’re using passive speakers in your outdoor PA system, you’ll need an external amplifier or mixing desk to power them. However, if you’re using active speakers, they’ll already have built-in amplifiers – so you don’t need an external amp or power source. Some actually have batteries too, which is why fitness instructors use portable PA speakers!
How much electricity does a PA system use?
The best way to figure out how much electricity your PA system will use is to multiply the audio output power by 1.4 (this is how much mains power you need) and then divide by 230 to find out the current consumption. For example, a 900-watt PA at 250v will need 3.60 amps. The amount of electricity used by a PA system will depend on the power of the PA speakers and the mixing desk used. Higher wattage or dB means more power is required.
How do you balance the sound in a PA system?
The quickest way to balance a PA system is to set up the mics on stage to how you need them, bring your master fader to 0dB or unity gain, then bring your master fader to 0dB or unity gain. Switch on the mixer and slowly increase the gain to see if any start to feedback. When something feeds back, roll it back just to where it stops feeding back. Once you’ve found which band or frequency is feeding back using your graphic equaliser, slowly lower the fader (not the gain) until the feedback stops.
Final thoughts
In case you haven’t already guessed, setting up your outdoor PA system is actually not that difficult.
Simply by following the easy setup tips, you’ll be well on your way to creating really nice outdoor events with clear, powerful audio. As always, invest in the highest-quality equipment you can first, always position your speakers towards the crowd and in front of performers, and go easy on the gain staging. With a little attention to detail and some great gear, I’m confident your next outdoor event, show, or mini-festival will be a huge success!
Good luck!


")


0 Comments