

Fancy giving music recording a go but not quite sure where to begin? This guide is here to help you take those first steps without any stress or confusion. We’ll teach you how to record music, walking you through the process in a clear and simple way, from setting up your space to hitting the record button.
It doesn’t matter if you have loads of gear or just a laptop and a few ideas. You don’t need a fancy studio to start making music you’re proud of. This guide is all about showing you what’s possible and helping you build your confidence along the way.

In a hurry? Here are the three things to remember
- Start with the basics: You don’t need a studio full of music gear to get going. A decent mic, audio interface, headphones, and DAW are more than enough to start making great recordings at home.
- Plan your track and set your levels: Before you hit record, you should have a rough idea of which instruments or vocals you want to capture and how you want to build up a track. You should also make sure your input levels aren’t too high or too low. Aim for a clean, clear signal that doesn’t clip. A bit of prep here will save you loads of hassle later on.
- Take your time and enjoy it: Recording music is a process – don’t rush it. Record multiple takes, experiment, and keep things relaxed. The more fun you have, the better your music will sound.
How to record music
1. Make sure you have the right equipment
 Before jumping into recording, it’s worth making sure you have the right equipment in place. You don’t need a full studio or a massive budget, just a few essentials that’ll help you record clean, clear audio from home.
Start with a DAW (Digital Audio Workstation), this is your main recording software. It’s where you’ll capture your tracks, edit them, and mix everything together. PreSonus Studio One Pro 7 is a great place to start. It’s intuitive, full of useful tools, and makes recording feel straightforward, even for beginners.
Next, you’ll need a decent microphone. A condenser mic works well for vocals and acoustic instruments. The Rode NT1 Signature Series gives a detailed, natural sound and handles home recording environments brilliantly.
You’ll also need an audio interface to connect your mic and instruments to your computer. The SubZero AI1 is a great first audio interface, with a USB-powered design, plug-and-play functionality, and onboard 48V phantom power.
Similarly, the Focusrite Scarlett Solo (3rd Gen) is reliable, affordable, sounds great, and is easy to use, ideal for those seeking studio-grade sound at an affordable price tag. To learn more, check out our guide to audio interfaces.
Lastly, a good pair of headphones will help you hear your recordings clearly. The ADAM Audio H200 Closed-Back Headphones offer great clarity and comfort, perfect for monitoring your sound as you record as well as mixing and mastering during post-production.
2. Set up in a suitable recording space
Getting your space right is just as important as having the right gear. Again, you don’t need a super professional setting with expensive treatment; a quiet spot with decent acoustics will go a long way. Pick a room with soft furnishings – curtains, carpets, and cushions help reduce echo.
Avoid rooms with lots of hard surfaces, as sound can bounce around and muddy your recordings. If possible, choose a space away from noisy roads, loud appliances, or busy areas in your home. Make sure there’s enough room for your gear. You’ll need a flat surface for your laptop, audio interface, and microphone stand. Try to position your mic away from walls and corners to avoid unwanted reflections
If you’re using speakers, place them at ear height and form a triangle with your listening position. You also need to ensure you don’t have the backs of the speakers directly against a wall, as this will give you unwanted resonance and a muddy sound. If you’re using headphones instead, find a comfortable spot to sit where you can focus.
Connecting everything is simple. Plug your mic into your audio interface, then connect the interface to your computer via USB. Open your DAW, select the interface as your input device, and you’re ready to record.
3. Set up your DAW
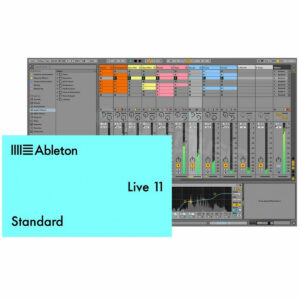 Once your gear’s all connected, it’s time to get your DAW ready. This is where all your recording, editing, and arranging happens. Two great options for beginners are Ableton Live Standard and Image Line FL Studio Fruity Edition. Both are user-friendly, packed with features, and ideal for home recording.
Start by creating a new session or project. Give it a clear name so you can find it easily later. Before you do anything else, check your sample rate and bit depth settings. For most home recording setups, 44.1kHz and 24-bit is a solid starting point. These settings affect the quality and size of your audio files.
Next, create individual tracks for each instrument or vocal you plan to record. For example, create one track for lead vocals, one for guitar, one for backing vocals, and so on. This keeps everything organised and makes editing much easier down the line.
To ensure you get the best possible audio quality, you should also invest in some good cables such as those from Mogami.
Make sure each track is armed for recording and set to the correct input (this is usually linked to your audio interface). Once everything’s set, do a quick test recording to check levels; then you’re ready to start tracking properly.
4. Check your levels
Before you hit record, it’s important to check your levels. This helps avoid distortion, clipping, or recordings that are too quiet to work with later on.
Start by setting the volume on your instrument or microphone. If you’re using something like a guitar or keyboard, turn it up to a comfortable level without maxing it out. For vocals, make sure you’re standing a good distance from the mic: not too close, not too far.
Next, adjust the gain on your audio interface. This controls how much signal is being sent into your DAW. The Universal Audio Volt 1 is ideal for this, especially if you’re recording guitars or vocals. It features a vintage preamp mode that gives your sound a bit of extra warmth and character.
If you’re after something with more inputs and high-speed performance, the PreSonus Quantum ES 4 is another strong choice. The PreSonus Quantum ES 4 can also help in setting your levels with its unique “Auto Gain” functionality which will set the perfect gain level for your mic/instrument at the touch of a button.
Keep an eye on your levels in your DAW. Aim for peaks around -6dB to -3dB. This gives you a clean signal with enough headroom for mixing later. Take a minute to test everything. If it sounds clear and nothing’s peaking, you’re good to go.
5. Record enable your track
 Before you can start recording, you’ll need to ‘record enable’ the track you want to use. This tells your DAW which track should be actively listening for input from your microphone or instrument. If you don’t enable it, nothing will be recorded (even if everything else is set up correctly).
Look for a small circular button, often red, on each track in your DAW. When you click it, the track becomes armed for recording.
You’ll usually see some movement in the input meter, showing that sound is being picked up. This helps you check levels one last time before recording. You can ‘record enable’ multiple tracks at once if you’re capturing more than one sound source. For example, vocals and guitar. Just make sure each one has the correct input selected.
Once your track is enabled and levels are looking good, you’re ready to press record. Don’t worry if it takes a few tries, it’s all part of the process.
6. Record a guide track
A guide track is a rough version of your song that helps you stay in time and on track while recording other parts. It doesn’t need to be perfect, it’s just there to give structure and direction.
Start by recording a simple version of the main part of your song. This might be a vocal line, acoustic guitar, or keyboard – whatever helps you map things out. Use a metronome or click track to keep everything in time, especially if you plan to add drums or other instruments later.
The guide track should follow the full structure of your song (intro, verse, chorus, bridge, and so on), this makes it easier to line up future recordings and avoid getting lost halfway through a take. Once it’s done, you’ll use this guide as a reference. You can mute or delete it later, but for now, it’s a handy tool to keep your session organised and flowing smoothly.
7. Record individual tracks
 Once your guide track is in place, it’s time to record your song properly, one part at a time.
Recording individual tracks helps you stay organised and makes editing easier later on. Start with the rhythm section, like drums or percussion. These set the pace and help everything else fall into place. Next, record the bass. Locking the bass in with the rhythm gives your track a solid foundation.
Once that’s done, move on to harmonies such as chords on guitar or keys. These fill out the middle and give your song body. Then it’s time for the melody and lead parts. This could be a guitar solo, a piano riff, or any instrumental line that carries the tune.
Finally, record your vocals. These usually sit right on top of the mix, so it’s best to add them last once everything else is in place.
Always record multiple takes of each part. This gives you options and makes it easier to piece together the best version later. Don’t worry about getting everything perfect in one go, just focus on capturing solid performances.
8. Edit and arrange
Once you’ve recorded all your parts, it’s time to edit and arrange your track. This is where you shape your raw recordings into a song that flows well and sounds polished.
Start by comping your takes. If you recorded several versions of each part, listen back and choose the best bits. Most DAWs let you cut and combine sections easily, so you can create a single, strong performance from multiple takes.
Next, clean things up. Trim the start and end of each clip, remove background noise, and make sure everything lines up properly. A tidy session makes mixing much easier later on and helps everything stay in time.
If anything feels a bit loose, use quantisation to tighten up the timing. This works especially well on drums, rhythm guitar, or keys. For vocals or melodic parts, light pitch correction can help smooth out any rough notes while still keeping the natural feel of the performance.
Once everything is sounding good, move on to the arrangement. Start shaping the structure of your song by organising your clips into sections like verse, chorus, bridge, and outro. You can copy and paste parts, mute sections, or move things around to see what flows best.
Effects play a major role in editing and post-production, allowing you to contextualise your various recorded parts. For example, using compression on vocals can help to make them stand out within the mix, as well as creative EQ’ing and maybe some saturation if needed.
Think about energy and dynamics. A quiet build-up into a louder section can make a big impact. Trust your ears and adjust as you go. Your song’s structure is just as important as its building blocks (your recorded tracks) and can make or break your track.
9. Save your work
 It might sound obvious, but always save your work as you go. Recording sessions can be long, and the last thing you want is to lose progress because of a crash or power cut. Get into the habit of hitting save every few minutes. Most DAWs also let you set up auto-save, which is well worth doing.
Create backups of your project files too. Save copies on an external drive or cloud storage so you’ve always got a spare if something goes wrong. A few extra seconds now can save hours of work later.
While a lot of DAWs now have an auto-save backup feature built-in, it’s still a good idea to continually save whilst you work for peace of mind.
Extra steps: mix and master
Once your track is arranged and edited, you can move on to mixing and mastering. These are the final steps that help your song sound polished and balanced across all speakers.
Mixing involves adjusting levels, panning, and adding effects like EQ, reverb, and compression. This helps each instrument sit in the right place so nothing clashes or gets lost.
A great all-around EQ that is fast becoming the industry standard is the FabFilter Pro Q. If you’re looking for pitch correction, Celemony’s Melodyne Essential is one of the most advanced pitch correction tools on the market.
Mastering gives your track its final shine. It brings everything up to a consistent volume, balances the overall sound, and prepares your music for sharing or streaming. You don’t have to dive into everything at once, just take it step by step.
If you’re just starting out, try experimenting with basic mixing tools and build your confidence from there. Mixing and mastering can seem daunting at first but with a bit of practice, it all starts to make sense.
FAQs
Can I use my phone to record a song?
You can absolutely use your smartphone to record a song with surprisingly good results. Many smartphones have solid built-in mics and there are free apps designed for multitrack recording. For better quality, consider using a clip-on mic or audio interface for mobile devices.
How can I record my song for free?
You can record your song for free using free DAWs like Audacity, BandLab, or Cakewalk on your computer. These tools let you record, edit, and mix without spending anything. All you need is a microphone and an audio interface, which can also be borrowed or shared.
What equipment do I need to record a song?
To record a song, you’ll need a DAW, audio interface, microphone, and headphones at the very least. A basic setup like this allows you to capture and monitor your performance clearly. You can expand later with instruments, monitors, or acoustic treatment.
Final thoughts
Knowing how to record music is a great skill to have – and you can start in a really simple, manageable way. Begin with the basics, build your confidence, and don’t worry about making everything perfect straight away. The more you experiment, the better you’ll get.
If you’re looking to expand your musical knowledge further, check out the other articles below.
9 Tips for Mixing Rap and Hip-Hop Vocals
What is MIDI? Everything You Need to Know About This Vital Tool
How to Sample a Song – A Step-by-Step Guide


0 Comments