

How much thought have you given to proper monitor setup and placement? What about acoustic treatment? Have you ever looked at your monitors’ dip switches or EQ settings if they have any? If you haven’t considered these things, you might be missing out on maximising the sound of your home studio.
We’re here with a quick and easy guide to how to set up your studio monitors. We’ll show you how to get the most out of your speakers and acoustic treatment and how to measure your room so you know exactly how to manage all of it.
Key takeaways
For anyone in a rush, or who just needs a refresher, here are our main lessons for speaker placement and managing your room:
| Sound in any enclosed space will reflect off any surface that isn’t designed to absorb it. |
| Reflected sound impacts your monitors by creating standing waves. These are dips or boosts in frequencies that occur when the reflected signal interferes with the phase of the direct sound as it reaches your ears. |
| You can optimise your listening position by ensuring that the high-frequency driver of your speakers is at the same height as your ears. They should be angled at about 45 degrees towards your listening position and there should be an even distance between each speaker and where you sit. |
| Different frequencies have different wavelengths, the longer the wavelength, the more absorption is needed to handle it. Higher frequencies have shorter wavelengths and lower frequencies have longer wavelengths. |
The fundamentals of room acoustics
Sound is a vibration that travels in waves of varying air pressures from a source.
Outdoors, sound will travel until it either hits something, or the energy of the thing that first caused a sound isn’t strong enough to keep moving the air. Indoors, however, is where the problems start, and this affects every single room, from living rooms to kitchens to home studios.
As we established, sound will move until it hits something. So, what happens when it does? It bounces off it and loses some energy as a result. Therefore, when we’re inside, sound bounces off absolutely everything: walls, ceilings, floors, doors, windows, furniture, even people!
This is a problem for musicians, producers, and engineers because reflections impact how the sound is perceived when listening to it, which can affect what we think we hear when recording or mixing.
This can really get in the way for two main reasons. One, our recording equipment, like microphones, can pick up reflections and sound with poor quality, and two, we won’t hear how things actually sound, which significantly affects our decision-making when making music.
It can cause us to EQ frequencies that don’t need it or change microphone positions and get a worse sound when recording.
When you want to optimise a space for audio, you have to consider all of this, but we can focus it down to the most impactful points. Even in the most minimally arranged studios, we’ll at least see four walls, a floor, a ceiling, and a large desk. This means we get reflections from the wall, ceiling, and desk interfering with the quality of sound. No space can ever be perfect, but we can do a lot to correct these issues.

How your room affects the sound of your monitors
There are three main points of reflection in a room that will cause reflections: walls, desks, and ceilings. It’s important to understand the impact of all of these, so let’s break them down one by one.
Wall reflections
 Rear walls are the most significant factor in wall reflections, as they’re the most direct point that sound will tend to reflect from before bouncing off any other surfaces.
Of course, sound doesn’t disperse in a perfectly straight line, so other surfaces like desks and ceilings also get reflected sound. But the direct relationship between most of the sound and the points on the walls directly opposite your monitors makes this one of the easiest and most impactful spots to sort out.
Wall reflections tend to carry the most energy and range of frequencies, reflecting the entire frequency spectrum back towards your listening position. This creates the most standing waves, as it won’t just impact your bass or midrange frequencies, and will interfere with the accuracy of absolutely everything you hear.
It’s also worth considering the walls in front of you, directly behind your monitors. The closer your monitors are to the wall, the stronger the low-end build-up is. This tends to sit at around 100 Hz, which really muddies up your low-end.
However, this build-up doesn’t disappear with the distance between your monitors and the wall. Instead, it simply increases the frequency. This is a benefit, letting you push the resonance into a frequency range where you can more easily treat it.
Desk reflections
Desk reflections are the next natural reflection point within any home studio. Obviously, if you have a desk, sound will reflect off of it. There are two causes of desk reflections, and you should look at correcting both.
First is the enclosure of your monitors. As they kick out sound, the pressure will cause reverberations through the cabinet that will transfer to your desk, causing rumbling. Then, there’s the extra factor of the dispersed sound bouncing against one of the nearest surfaces to where it’s being pushed from. The shallower your desk, the less of an issue this is.
Desk reflections sit around 250 Hz, impacting a key area of your midrange – often where the body of vocals, guitars, and snare drums sit.
Ceiling reflections
Ceiling reflections are another element that has a big impact on the sound of your space, especially with taller ceilings. Flat ceilings also reflect a lot more.
Some rooms will be more impacted by this than others, but this is an often overlooked and underrated aspect of treating a studio space, and it’s definitely worth fixing because it can be hard to notice how it’s affecting your sound until you’ve already fixed it.
How to set up your studio monitors
How do I connect my monitors to my computer?
 Connecting your studio monitors to your computer used to be a more complicated process, but with so many different products and convenient routes to go down nowadays, it’s easier than ever.
The first thing to consider is your main output source. Whether you have an audio interface, a desktop mixer, a monitor controller, or a full-blown console – you need to see what kind of monitor outputs it has.
Usually, this should be a 1/4-inch jack port. However, in some cases (such as on most desktop mixers), you’ll need a 3-pin XLR output to connect to monitors.
The next important aspect is identifying the inputs on your monitors. These will come either as a 3-pin XLR input, a 1/4-inch jack input, or perhaps both, and they offer the best sound fidelity.
It’s extremely important to ensure that your 1/4-inch speaker cables are balanced or in TRS format (often referred to as stereo jack). You can identify this through the two black rings on the jack connector instead of one.
This type of cable reduces unwanted noise and maintains the integrity of your signal, which is an important benefit. If you’re not sure, it might be worth checking your cables first to improve your sound quality.
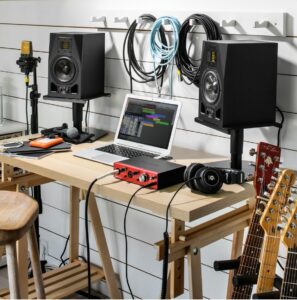
How do I position my monitors?
When positioning your monitors, the most important thing to consider is height and angle. Whatever your space and setup, the high-frequency drivers of your monitors should be at ear height relative to you. This helps your ears receive more direct sound from your monitors, resulting in a richer and more detailed listening experience. This same principle applies to the angle of your monitors.
If you don’t position your monitors towards your ears, you’ll hear more reflections from some of the other surfaces in your studio. This combined sound gives you a less accurate picture of what’s going on, making it harder to mix. You should also make sure your monitors are placed around 8 to 12 inches away from any walls and corners. This should help prevent reflections from your front walls.
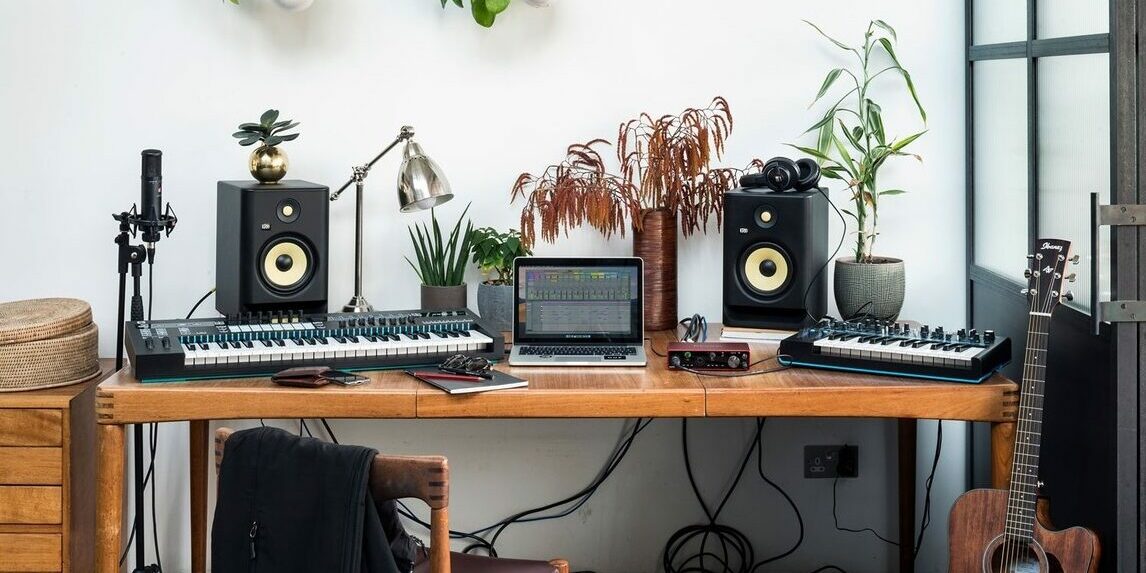
Consider your two speakers as two points of a triangle, with your head being the third. Ideally, you want the distance between your pair of monitors to be equal to how far back your head is from them – on all sides. This means that, for the same reasons as we want monitors to be at the same height as our ears, we also want them to be angled towards our ears.
This ensures that you get a more accurate sense of the stereo field, so you can get accurate panning. These two positioning solutions are the best way to get started with good monitoring practice, but there’s a lot more you can still do to get the most out of your speakers.
Monitor stands – desktop or floor?
 Floor monitor stands tend to be quite large, which means you need a bigger studio space to make the most out of them and position your monitors on them correctly.
Desktop monitor stands are perfect for a quick, compact solution to monitor positioning.
They also tend to be shorter, meaning that the stands you choose also play into the height you want to achieve for your monitors to be in the right spot.
If your desk is low down and you don’t think you can get your monitors level with your ears with the few extra inches afforded by desktop stands, you’ll need something taller.
Floor stands also tend to be for bigger monitors; you might want to look at monitors with at least 5-inch woofers on floor stands. Desktop stands, meanwhile, suit anything from the small 3.5-inch woofers to 8-inch woofers.
How to measure the sound of your studio room
Once you have the right setup, you’ll need to think about improving your sound further with acoustic treatment and measuring your room.
There are a few different ways you can go about doing this, depending on what monitors you have. For example, Neumann and Genelec monitors have their own room alignment systems. Some bundles of their monitors may come with measurement microphones of their own, or you might need to buy a dedicated one.
Alternatively, for those on a budget, if you’re willing to do a little work, free software like Room EQ Wizard and purchasing a good, separate measurement microphone will let you profile your room so you can see exactly what you need to treat, build plans for your acoustic treatment, and see what control and dip switch settings you might need to use to improve the response of your monitors.
When reading this measurement chart, understand that you’ll never be able to get your room response completely flat; it’s an unfortunate reality of sound in any enclosed space. However, any significantly large bumps or dips can definitely be addressed through proper acoustic treatment and speaker adjustment.
Whatever approach you use, set up your microphone in your listening position, and then activate your measurement system. This will usually play some form of noise—white or pink typically—or sweep frequencies. This can get harsh to listen to as it works, but it helps the microphone understand exactly how your space responds to each frequency with incredible accuracy.
Fixing your room by adjusting your speakers
Speaker positioning
We’ve established this, but it bears repeating. You want a perfect equilateral triangle of spacing between each of your monitors and your listening position. You also want the high-frequency drivers levelled and angled towards your ears, with your monitors placed around 8-12 inches away from all corners and the nearest walls.
Speaker tone controls
Even without automatic correction, most modern studio monitors tend to have at least some high and low EQ controls, or even sound preset dip switches to help you adjust key frequencies. Looking at the profile of your room while controlling the dip switches or whatever EQ controls you can find on your monitors will help you achieve a much better sound in an incredibly affordable way.
You might have to go for a paid service at some point, but if you’re strapped for cash and want a good bang-for-your-buck way to start with room measurement, this is an excellent first step that will put you ahead of those who didn’t.
DSP speaker management
DSP speaker management provides a highly custom and deeply corrective EQ curve to your speakers, as well as control and configuration options. This can scale from stereo to surround sound and Atmos setups.
Fixing your room with acoustic treatment
There’s really only one way to manage audio reflections in a room, and that’s acoustic treatment. And to clarify things, using absorption panels is not the same as soundproofing – a lot of people conflate the two, but soundproofing is much more difficult to achieve and can only truly be done through construction.
Treatment can help make things quieter by reducing these reflections, but some sound will still escape and annoy your neighbours in a treated room if things get loud in the studio.
There’s a common misconception that the commonly seen acoustic foam panels don’t do much of anything, but this isn’t entirely true. You just have to be aware of the frequency ranges that typical foam blocks actually cover. These will vary from brand to brand and depend heavily on design, but many manufacturers will publish figures for this.
However, it’s true that foam panels are not thick or absorbent enough to manage low-frequency information, which is why they need to be paired with bass traps in the corners of your studio space. However, these panels can easily manage treble and midrange information due to their shorter wavelengths. The longer the wavelength of a frequency, the more absorption you need to tame it.
So, if you understand where your issues are in the frequency spectrum, you can easily figure out what you need to use. A lot of foam doesn’t perform as well as some professional options like mineral wool, for example – but with a well-designed product, smart placement, and a thought-out setup, you can fix your room with just about anything.
Wall reflections
 This is where the most work happens. The main solutions are to place panels in key strategic locations. First, think about panels directly in front of and behind your monitors; this significantly reduces direct reflections.
However, you will still get secondary reflections. Finding out where has an easy trick, for both your rear and side walls. Take a hand mirror and angle it at your monitors or move it along your wall. If you can see the full speaker cones from there, you need to put a panel there too!
Combine this with bass traps in the corners, and your walls will be pretty flat and even. All too often, you’ll see walls absolutely covered in panels.
Sometimes this is necessary due to the room, but most often it isn’t because you want a diffuse sound, and deadening too much can remove the energy and accuracy from what you hear too! Especially if you record in your studio, overkill on acoustic treatment can actually ruin the energy and emotion of a performance.
A good way of testing for issues in your room, especially after you’ve got some treatment up, is to walk around your room and clap. If you hear strange, metallic echoes like a delay effect, that’s called flutter echo. If you hear this somewhere in your room, that spot needs more treatment than it currently has.
Desk reflections
 Desk reflections are somewhat inevitable, but there are a few things you can do about it.
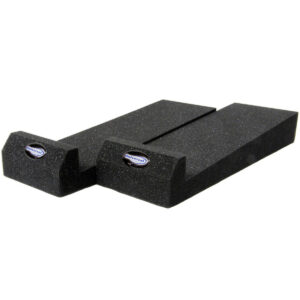
Number one, monitor isolation pads. These will reduce the vibrations from your speaker enclosures transferring through the surface of your desk and making your low-end messy.
Combine this with either desktop or floor stands, and you’ve done most of the work! Although it’s worth checking your speakers for dip switches or EQ settings around this range, many manufacturers are aware of this issue and have implemented this to help you get around the problem.
If this still interferes with your sound, you might have to learn to mix to compensate for it or think about investing in a shallower desk.
Ceiling reflections
Ceiling reflections are most problematic if you have perfectly square or high ceilings. If your space has either of these, you might want to consider investing in a hanging ceiling cloud. These dedicated ceiling panels tend to come with easy brackets to attach to your ceiling and suspend them above your listening position. Try to make sure this covers your listening position as much as possible, and you’ll be all set.
Diffusion
 Diffusion isn’t always necessary, but if you need to cover every inch of your studio with treatment, and your studio has become too deadened, diffusers are definitely worth investing in.
Diffusion doesn’t necessarily absorb reflected sound so much as it disperses it evenly.
The human ear still expects some reflections back in some spaces, as this is essentially what reverb is, but we know that reflections also cause standing waves.
So, to counteract this, diffusers are oddly shaped to spread the energy of the sound hitting it out equally, and absorbing what it can’t reflect.
This means that everything still sounds natural without any standing waves ruining the accuracy of your monitoring.
It’s likely that you’ll already get some natural diffusion from any untreated space and the dissipation of sound through your panels of choice that doesn’t get absorbed. But if you need more of a realistic-feeling sound after acoustic treatment, diffusers are the way to go.
Our product recommendations…
Studio monitors
All of this is in service of getting the very most out of your studio monitors, so here are our picks to give you the best performance from the start!
Yamaha HS7
Building on Yamaha’s heritage of studio monitor design, the HS7 draws on the classic sound of the NS-10 monitors from 1978, updated with modern improvements.
They feature a detailed sound with a 6.5-inch woofer and a 1-inch tweeter for a loud, present sound that can fill any home studio space.
Room Control and High Trim adjustment on the rear of these monitors help you adapt them to your space and can work great with speaker correction software.

KRK ROKIT RP5 G5
The KRK ROKIT RP5 G5 have three distinct voicing modes – Mix, Create, and Focus – that lets you tailor the monitor’s response to suit your workflow, whether you need accurate sound reproduction for mixing purposes, a more casual listening experience, or an emphasis on midrange frequencies for vocals.
The 25 EQ combinations allow for extremely precise fine-tuning based on your room’s acoustics, ensuring a well-balanced sound regardless of placement. And to ensure you can clearly see what settings you’re adjusting, there’s a built-in LCD screen.
In terms of sound reproduction, the RP5 G5 boast a 5-inch Kevlar woofer and a front-firing bass reflex port for controlled low-end response without unwanted resonance. These, combined with KRK’s custom transducer design, ensure a clear and detailed sound.

Genelec 8341APM
The 8341APM is a flagship monitor from Finnish manufacturer Genelec. A powerful three-way monitor, the 8341APM features a coaxial driver design that sounds wholly cohesive by placing the centre of its woofer, mid-range driver, and tweeter in the same place for a full, rich sound with a frequency response of 38 Hz all the way up to 37 kHz.
Its minimum diffraction enclosure and built-in waveguiding help prevent unwanted reflections and keep its sound consistent.
The 8341APM also comes complete with Genelec’s GLM monitor correction system – a range of adjustable dip switches to change its voicing and optimise its already-excellent sound for your space.
GLM offers some of the deepest room analysis available thanks to its GRADE report system and even creates system delay for consistent and well-timed firing between Genelec subwoofers and speakers, making it ideal for multi-speaker systems and even surround sound or Dolby Atmos mixing spaces.

Acoustic treatment
When you have your monitors sorted, the next step is naturally attenuating the sound of your space. From wall panels and bass traps to ceiling clouds and diffusers, we have a whole range to explore.
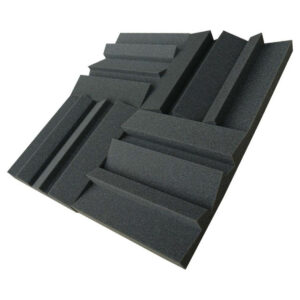
AcouFoam Acoustic Panels 4 Pack
The perfect addition to your wall treatment, this four-pack of AcouFoam panels will help absorb midrange and treble. Built from carefully selected acoustic foam to maximise its absorption, with a pyramid-shaped surface to increase surface area for increased effectiveness, these panels are a great starter choice for treating your walls.

AcouFoam Room Pack One
The AcouFoam Room Pack One is a comprehensive starter kit for acoustically treating your room. Ideal for home studios, this pack contains multiple wall panels with multiple shapes of surfaces, providing diffusion as well as absorption. Three different types of wall panels with dedicated corner bass traps give you the ideal performance for acoustic foam treatment.

Vicoustic VicStudio Box Treatment Kit
Vicoustic are a brand that have a long heritage of professional acoustic treatment solutions, even helping to provide custom treatment to high-end recording, mixing, and mastering studios. Their sleek, stylish acoustic treatment solutions are a go-to for audio professionals due to their performance, and the VicStudio Box Treatment Kit provides excellent value for money, giving you everything you need to optimise your room.
Consisting of eight Vicoustic Wavewood Ultra Lite absorption panels for targeted wall treatment and two of their Multifuser DC 2 diffusers, your room will sound natural, lively, and controlled.

Measurement microphones
If you’re going to correct your room, you’ll need to measure it. Plugging one of these into your interface and using profiling software at your listening position will help you measure your room’s response and get it sounding perfect.
SubZero M100 Reference Microphone
An affordable and high-quality reference microphone, the SubZero M100 has a complete frequency response from 20 Hz to 20 kHz, designed to be as flat as possible.
Complete with a clip and a windshield, the M100 will pair best with the Room EQ Wizard correction software to manually tune your studio.

Sonarworks Calibrated Measurement Microphone
Sonarworks’ SoundID Reference is probably the most popular speaker correction software on the market today, and naturally, their own measurement microphone is the best way to record your space to then profile it in their software.
A precise small-diaphragm condenser with absolutely no colouration, this microphone has been extensively tested by Sonarworks’ team of acousticians for total consistency.
This measurement microphone includes a 21-day free trial of SoundID Reference for speakers and headphones.

dbx RTA Reference Microphone
The dbx RTA is designed for not only home studio measurement and acoustic treatment but also for optimising the performance of their PA systems and power amps.
A highly accurate reference microphone that operates on phantom power, the RTA comes complete with a clip and a storage case for portable use.

FAQs
What is the 38% rule for studio monitors?
The 38% rule is a commonly stated rule that states your listening position should be 38% of the way into a rectangular room away from your front wall. This minimises standing waves for accuracy, however, it’s old professional studio wisdom and mainly applies to wall-mounted speakers – not when monitors are placed on stands or desks. However, it can still help improve your room response if you have the space to make it work.
How should my studio monitors be positioned?
Your studio monitors should be angled towards your listening position and spaced evenly apart to form an equilateral triangle between each speaker and where you sit. They should be set at a height that makes their high-frequency drivers exactly level with your ears. This maximises the amount of direct sound you hear, giving you more accurate monitoring.
What do you need to connect studio monitors to your computer?
You will need an audio interface and two cables to connect monitors to your computer. The audio interface will have at least two outputs, labelled 1 and 2, or L and R, to correspond to the left and right speakers. Depending on the monitors you have, you may need an XLR or a 1/4-inch jack cable to plug into the monitors, with another 1/4-inch jack plugged into your interface’s outputs.
Final thoughts
It takes a lot of knowledge to understand the techniques involved in how to set up your studio monitors correctly and the involved processes behind acoustic treatment. Hopefully, this guide has armed you with the tools you need to get started on improving the sound of your studio!


")


0 Comments